This is a tricky retouching question I get asked a lot (the question is tricky, not the technique itself, which is simple), and the question is:
“When I’m retouching a portrait, and the subject has a very prominent mole or scar, should I remove it?”
This is tricky because in still photos, facial blemishes and moles and such don’t just stand out, they’re exaggerated, but if you remove them, then not only are you removing something that is part of their facial character, you run the risk of people who know the subject realizing that the image been retouched (and if they removed that mole, what else did they do?).
There’s lots of reasons not to remove it, but…how about instead just reducing the effect of the facial feature so it doesn’t stand out? That way it looks more like it did when you were standing right in front of the person. Here’s how it’s done.

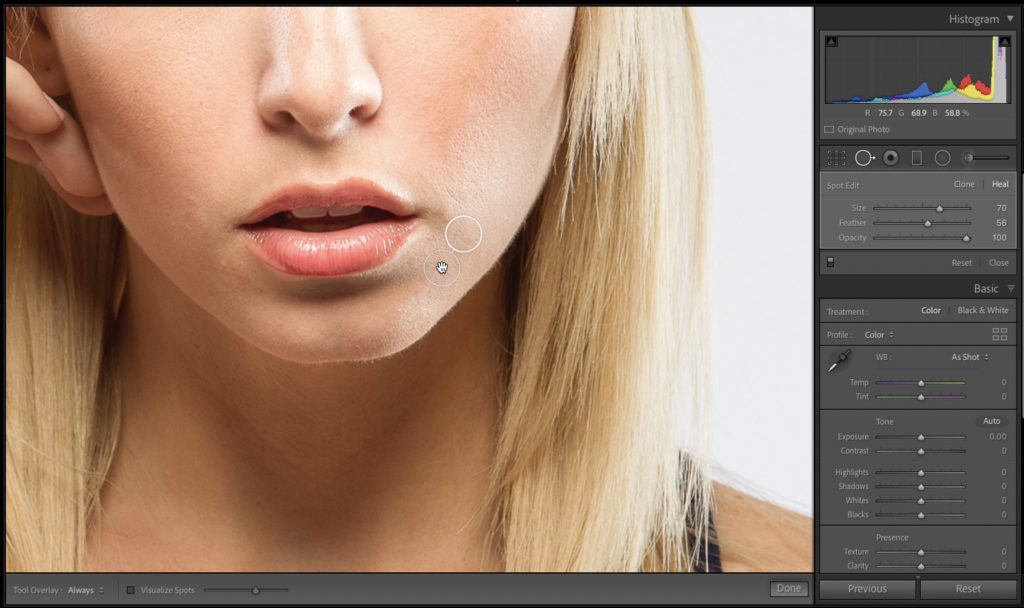
STEP ONE: In Lightroom get the Spot Removal tool (in the LR cloud, it’s called the Healing Brush). Make your brush a little larger than the mole or scar or whatever, you want to remove and just click once. The tool will find a nearby area of clean skin to sample from, and with any luck at all the mole (in this case) is completely and seamlessly removed. Admittedly, Lightroom’s tool is kind of a role-of-the-dice as to how it works because sometimes the places it chooses to sample from boggle the mind, but in this case, it worked, so don’t kiss a gift horse (and all that stuff).

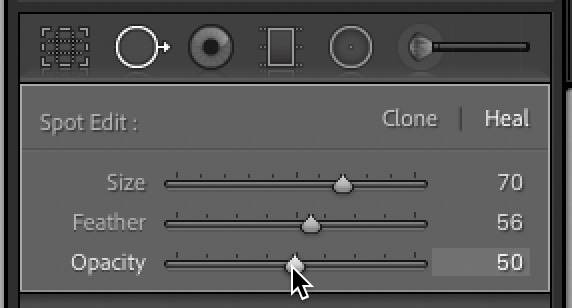
STEP TWO: Now that the blemish is completely gone, head over to the Spot Edit panel (near the top of the right side panels), and lower the Opacity to 50%. This is kind of “Undo on a slider” so dragging it to the left, reducing the Opacity, brings back part of the mole you just removed. By dragging it to 50%, you’ll still see the mole, but only at 50% of its original intensity so you reduce its impact on the portrait. That’s all there is to it (told ya it was easy).

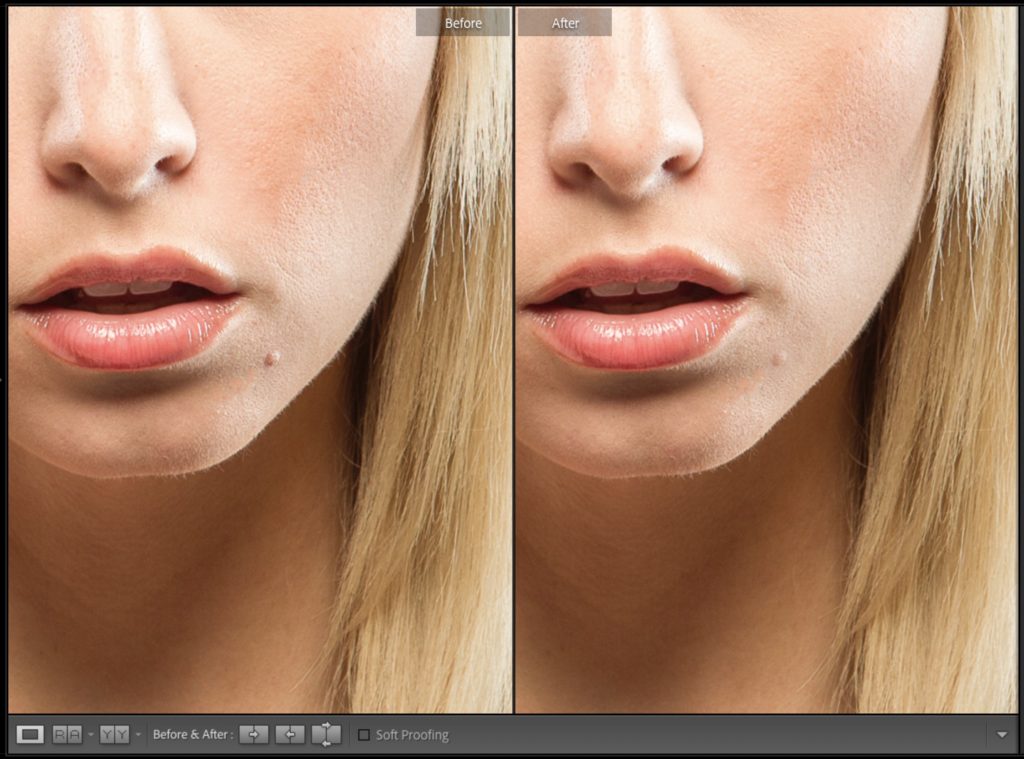
Above: Here’s a before and after, and you can see it’s clearly still there but with its impact and effect on the portrait much more limited, and more natural looking.
Well, there ya go. I hope you found that helpful. 
Have a great weekend, everybody. Stay warm, stay safe, and be kind to everybody, especially if their team just won the SuperBowl. 
-Scott
The post Quick Lightroom Portrait Retouching Trick appeared first on Lightroom Killer Tips.
![[DEV]Schenectady Photographic Society](https://dev.spsphoto.org/wp-content/uploads/2020/03/newsitelogo5-e1584673483198.png)