Parametric Filters in Photoshop open up a new world. First, these filters can easily be made in Substance Designer and imported into Photoshop.
Many parameters can be changed (hence the name Parametric). What’s really interesting is the way the filter interact with each other when you apply several on the same layer. They don’t just layer above each other, they combine, to open up a world of possibilities. Even if you aren’t excited about the current list of filters available, the important thing to note is the system and conduit that opens up a world of possibilities going forward.
For an in-depth look, check out the video above. Let’s jump into the features now.
Currently, (Nov 2023) this feature is only in the beta version of Photoshop. If you are reading this later, it may be in the mainline build of Photoshop now. Here’s how to get the beta.
Launch the creative cloud app at the top of your screen (mac) (bottom on Windows)
When Creative Cloud is launched, click beta Apps.
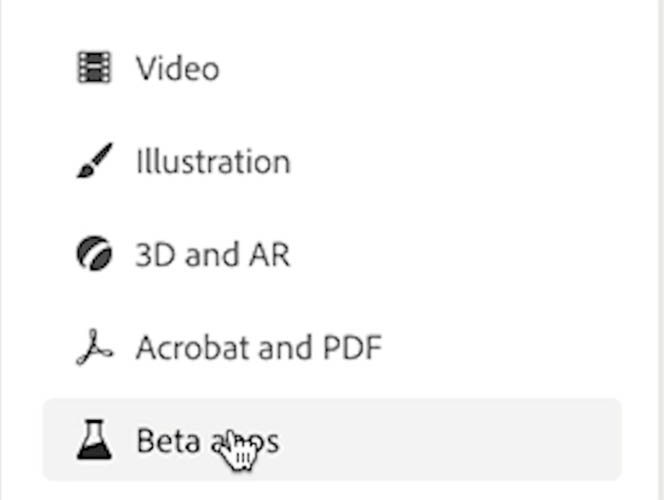
When you see Photoshop Beta, click install. (You must be a current CC subscriber to see this).

How to use Parametric Filters
Choose Filter>Parametric Filters to open the panel.

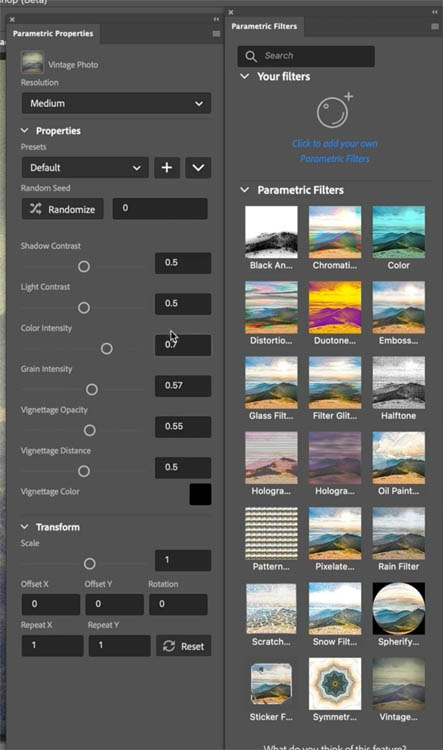
Here is the panel. Note, this panel will stay open unless you close it. Its not affecting the image yet.
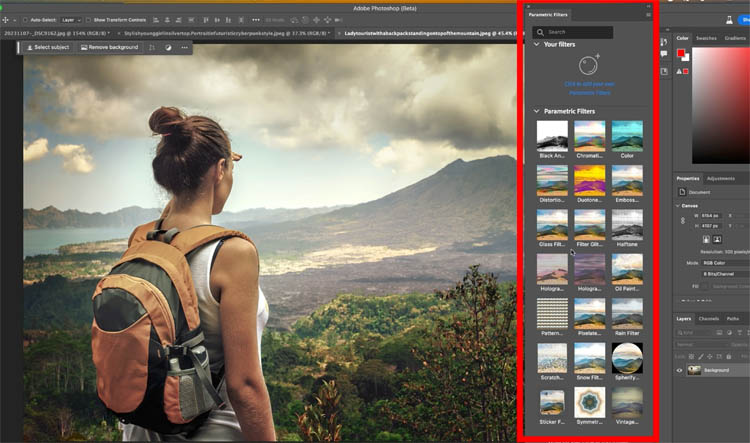
To apply the filters, choose your layer and click on any of the filters thumbnails.
You will see Photoshop duplicates the layer, makes it a Smart Object and applies the filter.
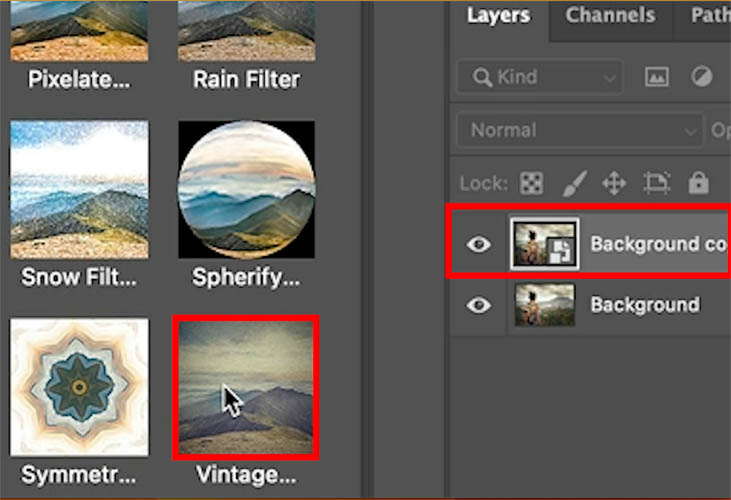
In the Parametric Properties panel, make adjustments. You can change many settings.
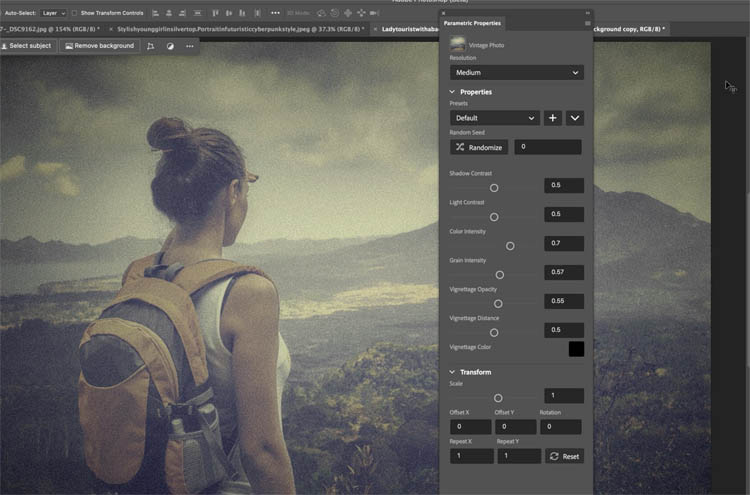
Here are the 2 parts side by side. The filters and Properties panels.
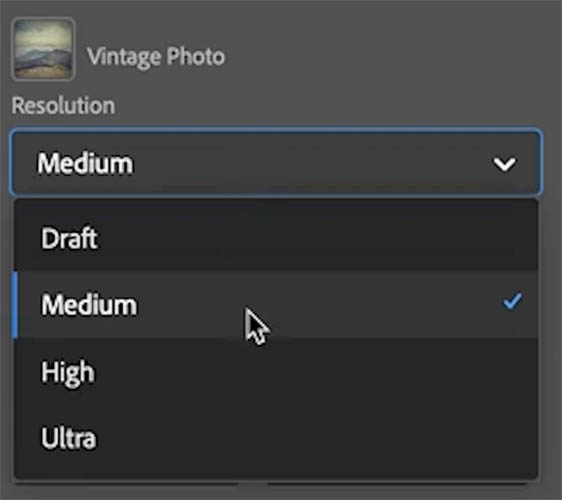
You will see a resolution drop down. By default its Medium. I suggest starting with that and changing to Ultra once you have all the settings where you like them for a better output.
Under the properties, you will see the presets, which are a good place the start with any filter.
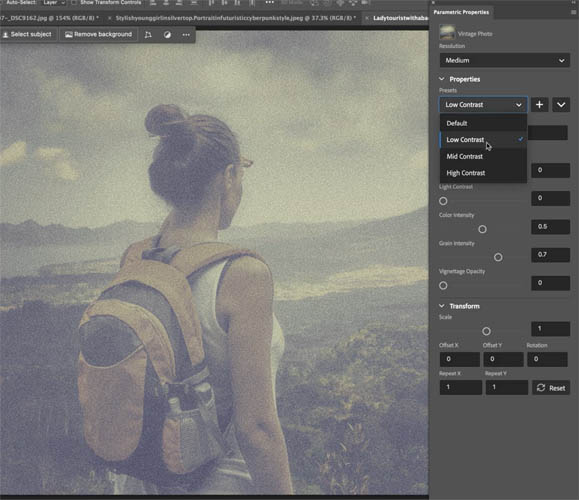
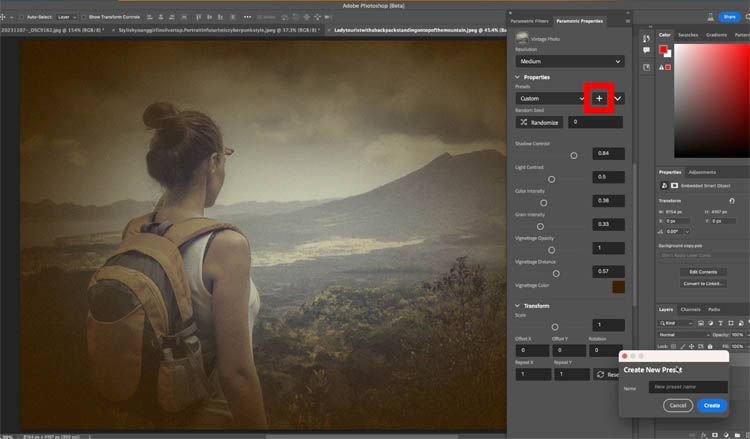
Once you have made adjustments, you can click on the plus button by presets to save your settings and use them again on other images.
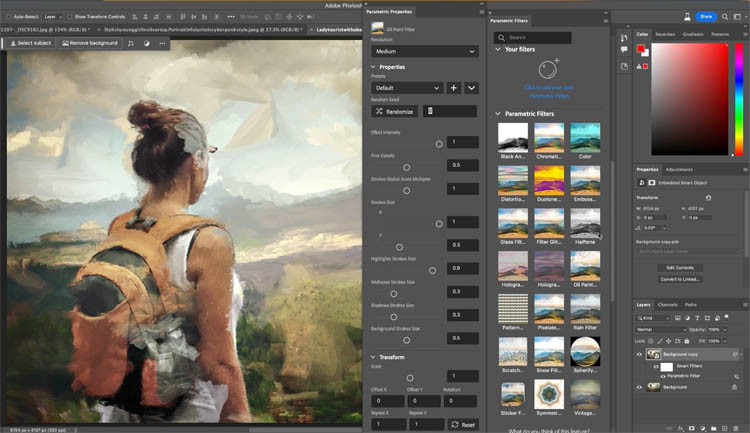
To change the filter, simply click the thumbnail for a different filter and it will switch out on your image.
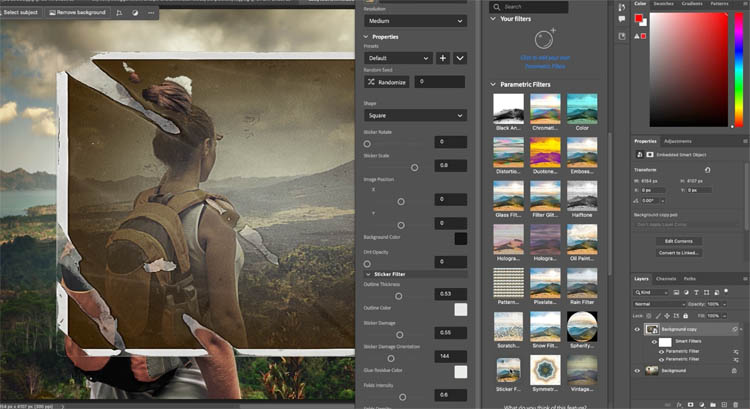
If you want to stack or combine filters, hold down the alt/Option key as you click a different filter. It will add this filter, rather than replace the filter.
Using Parametric Filters With Layer masks
You can use the filters with selections and even text layers and it will respect the transparency.
Lets apply to the background.
Choose the selection brush and click on Select Subject

This will select your subject.
Press Ctrl/Cmd+Shift+I to inverse the selection, so the background is selected.
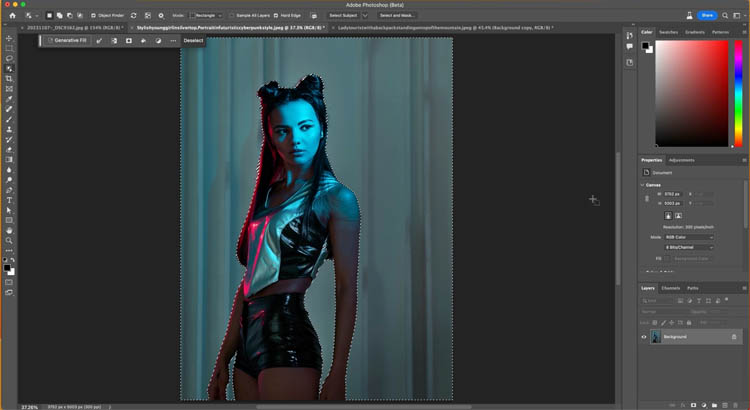
Click a filter to apply
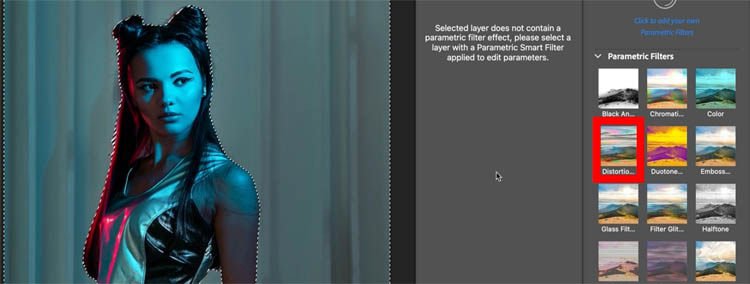
Photoshop will apply a layer mask and apply the filter
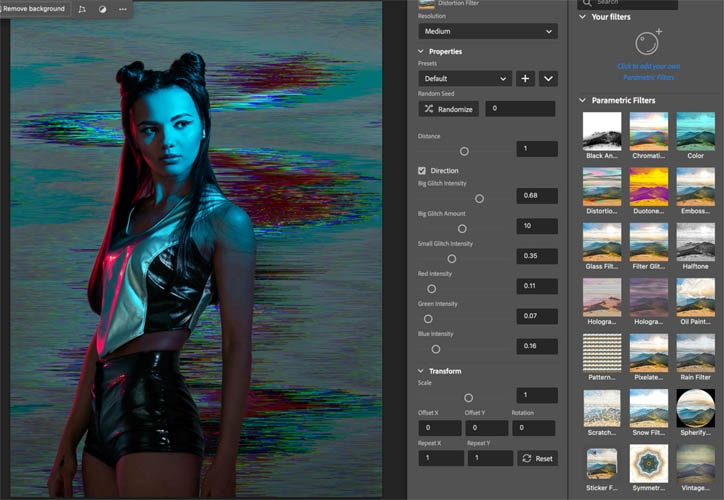
Hold Alt/Option and click a second filter, to combine both filters.
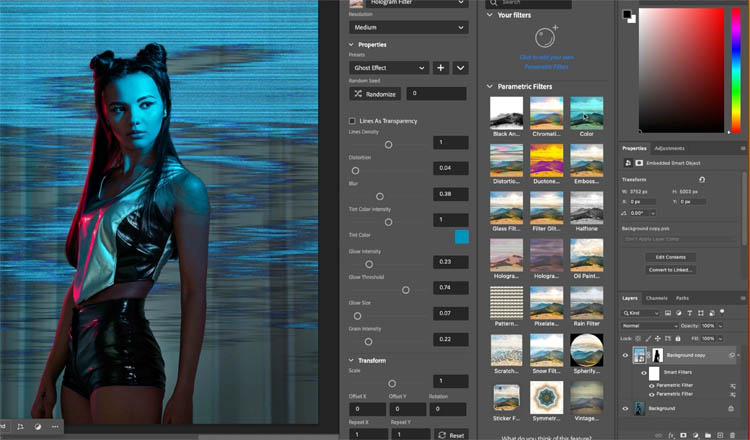
Just for fun, hold down alt/Option and click a third filter. See how you can stack multiple filters on a single layer.
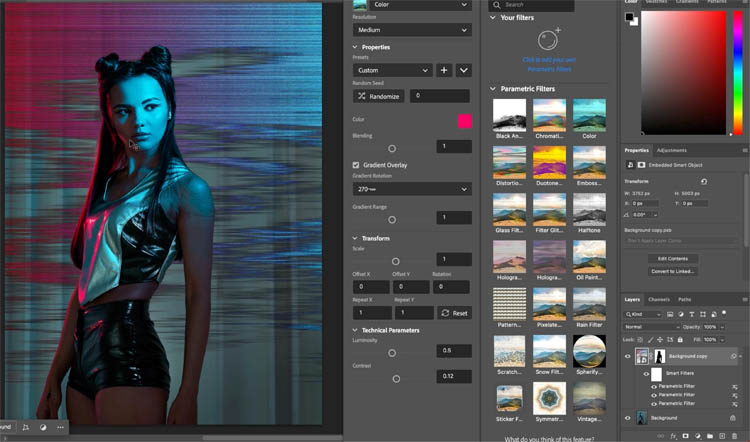
Here is a list of all the Parametric Filters currently in Photoshop
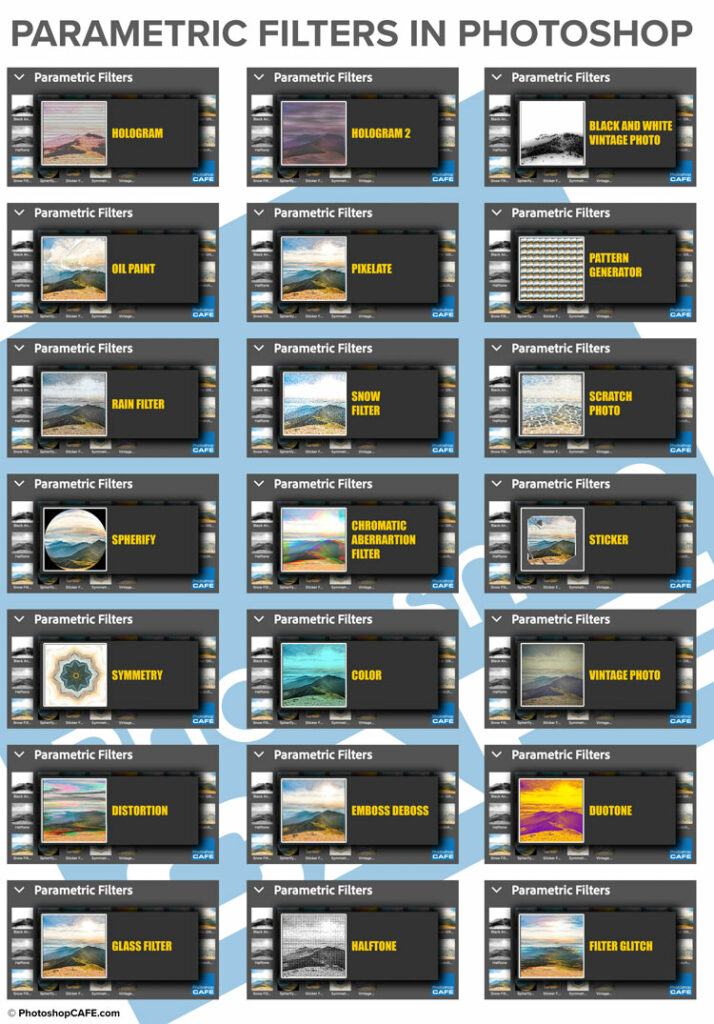
In the video at the top, I show you an example of each filter and give my advice on how to best use it and let you know if I think each filter is useful of not.
Here are the time codes so you can go directly to the filters you might be curious about.
05:36 Black and White Vintage
05:52 Chromatic Aberration
06:12 Color
06:33 Distortion Filter
06:45 Duotone
07:06 Emboss
07:12 Glass Filter
07:44 Filter Glitch
07:56 Halftone
08:12 Hologram
08:29 Hologram 2
08:40 Oil Paint
09:11 Pattern Generator
09:45 Pixelate
09:50 Rain Filter
10:12 Scratch Photo
10:55 Snow Filter
11:13 Spherify
11:46 Sticker
12:00 Symmetry
12:33 Vintage Photo
Thanks for checking out this tutorial. See you next week for another new Photoshop Tutorial.
Take care
Colin
The post Parametric Filters in Photoshop Ultimate Guide appeared first on PhotoshopCAFE.
![[DEV]Schenectady Photographic Society](https://dev.spsphoto.org/wp-content/uploads/2020/03/newsitelogo5-e1584673483198.png)