This is one I haven’t shared in a long time, but it’s one of those things I stumbled upon years ago and I thought, “Hey, that looks kinda cool,” but I wasn’t exact sure why at the time (well, now I know why, but I didn’t when I first found it).
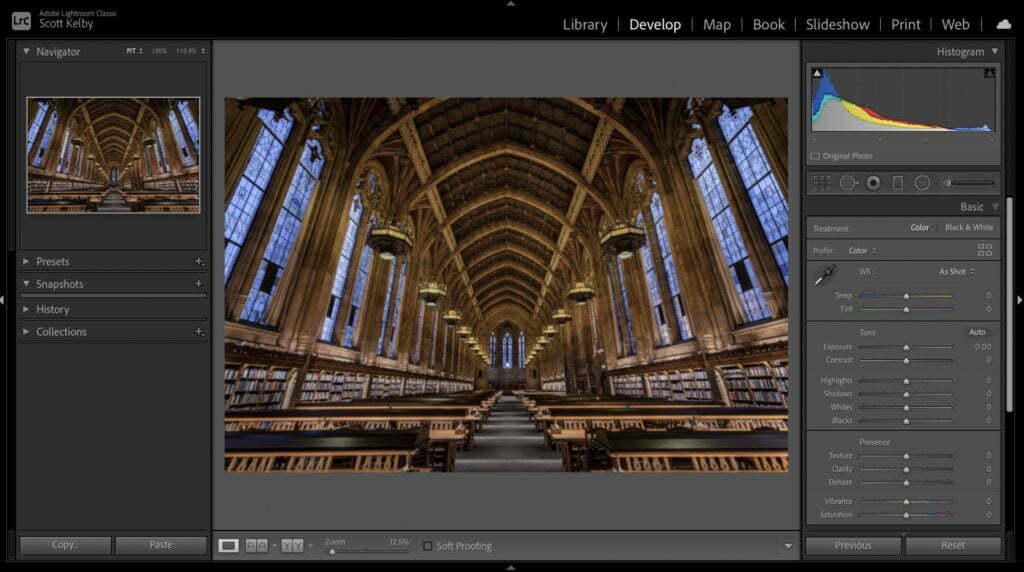
Anyway, the idea for this came to me a few years back while I was just doing my daily editing in Lightroom Classic. I usually work in a view called “Fit” which fits your entire image inside the center preview area, with a gray canvas area around it (as seen above).
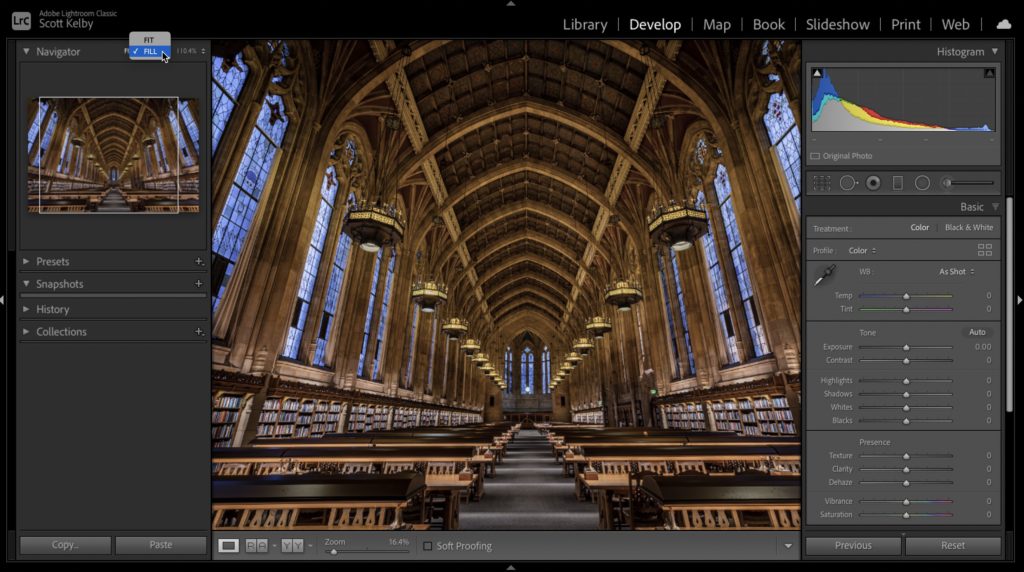
But for some reason, on this particular day I had my View set to Fill (so your image fills the entire center preview window — with no gray canvas area surrounding it, as seen above).

Normally, when I want to focus on just the photo, without all the distractions of Lightroom’s panels, I press Shift-Tab, which hides the top, bottom and side panels from view, so all you see is the photo, but on this particular day, instead I hid just the side panels (as seen above), and I’m looking at the screen and I’m thinking “Man, that wide view really looks kind of cool.”
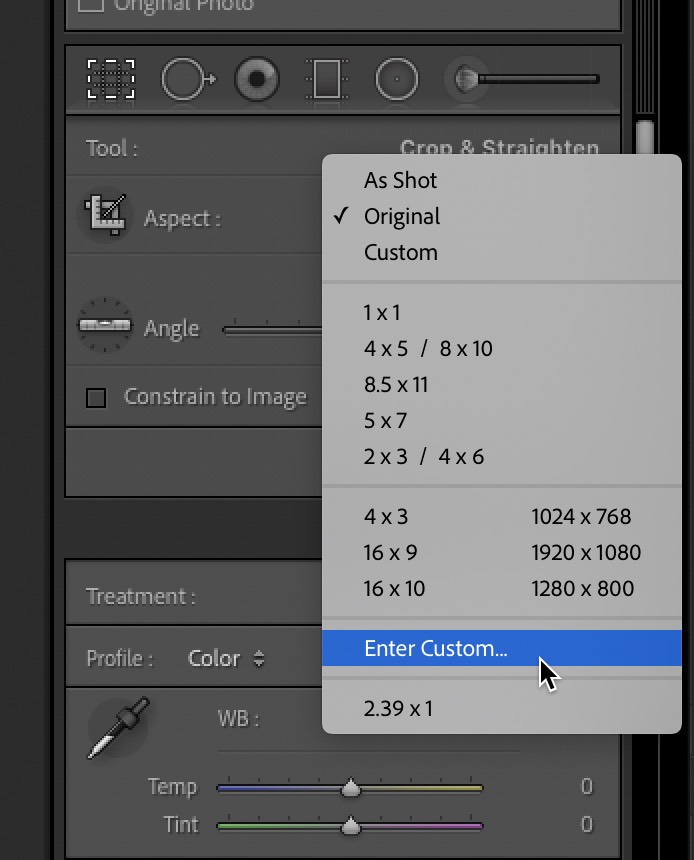
But but it wasn’t until I wrote a blog post about it that one of my readers who follows me on Twitter (Enrique San Roman) posted a comment that nailed it. He noted that you can go to Lightroom’s Crop Tool; go to the Crop pop-up menu and from the bottom of the menu choose “Enter Custom…” (as shown above).
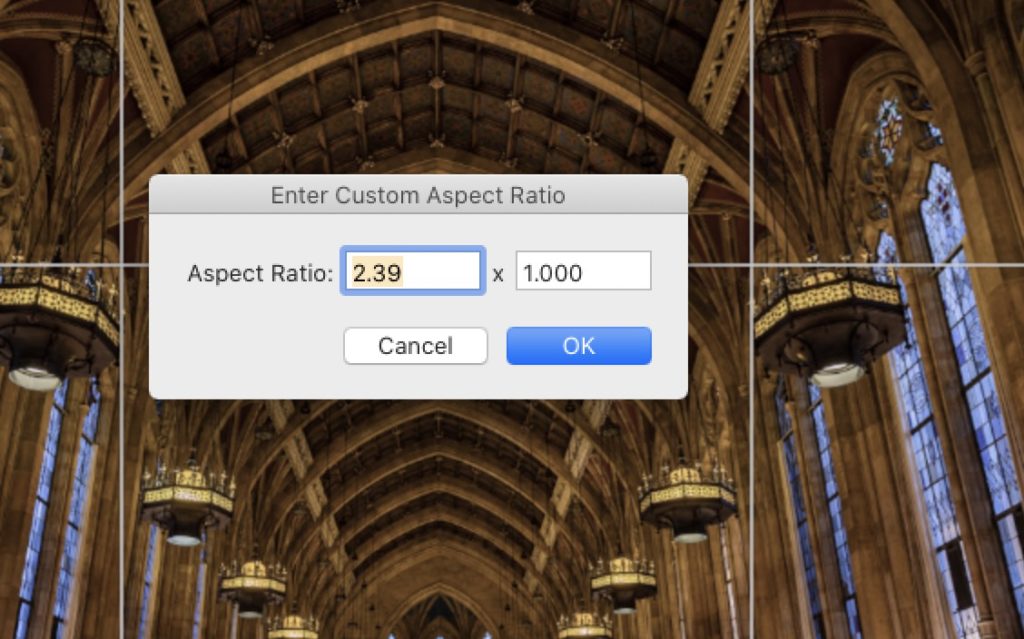
When the “Enter Custom Aspect Ratio” dialog appears, enter an Aspect Ratio of 2.39 to 1 to get the same type of cropping you’d get by hiding the left and right side panels. Enrique noted that the crop ratio is based on Panavision film (thanks Enrique!) which is (as a movie buff) probably why I was so drawn to this type of aspect ratio in the first place.
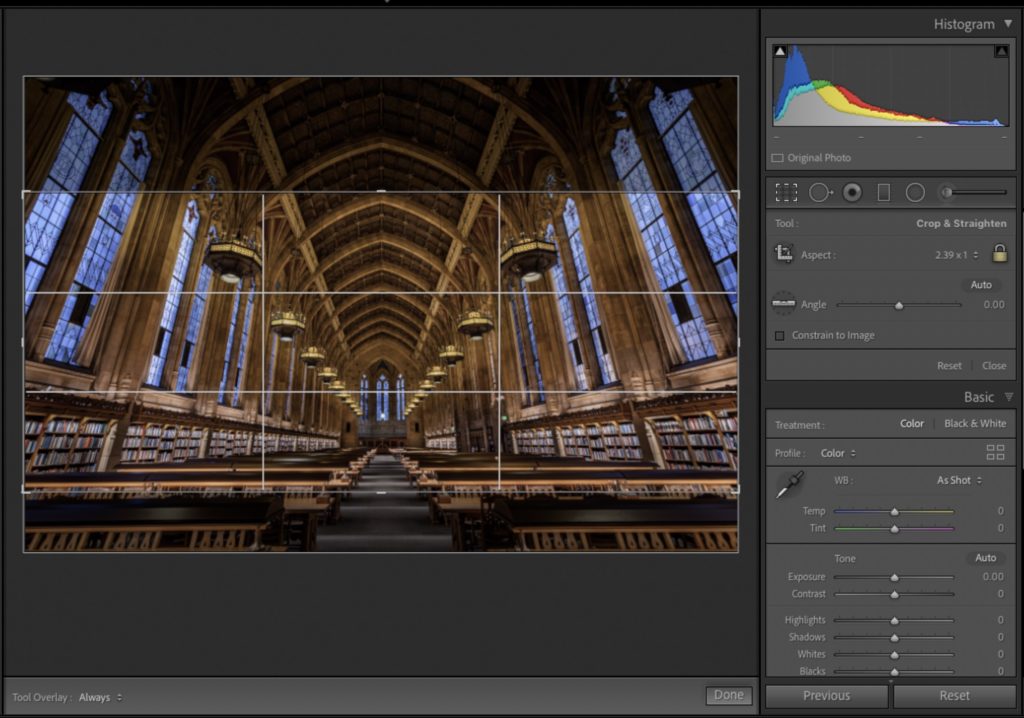
Above: Here’s how the crop border changes when you enter that 2:39 crop ratio. You can slide your image up or down inside that cropping border by just clicking and dragging.
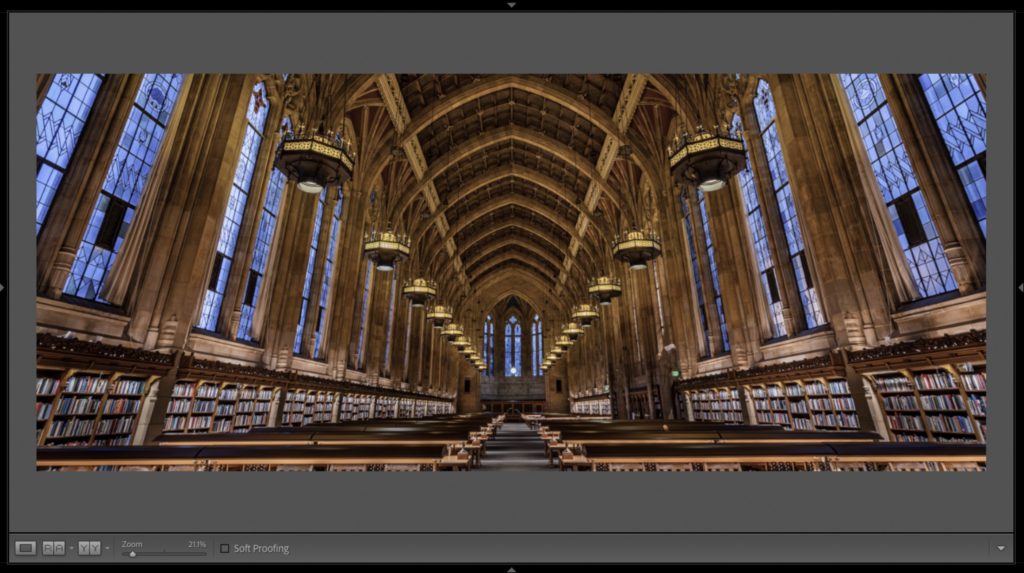
Above: Here’s the final cinematic widescreen crop after pressing the Return key (PC: Enter) to lock in your cropping.
Anyway, give this a try on some of your photos and see what you think. Of course, if you have Lightroom, just open any image, set the View to Fill (in the Navigator panel), and then just hide the left and right panels from view (press F7 and F8 to hide them), and there you have it—Cinematic Style Widescreen Cropping (without having to actually crop).
Hope you find that helpful (or at least kinda fun). 
The Flash Photography Conference is just three (or so) weeks away
I’m putting the trailer here (below) in case this is the first time you’re hearing about, but hundreds of photographers from all over have already signed up for The Flash Photography Conference (featuring Joe McNally), and you don’t want to miss out. Tickets and more details here, but make sure you check out the trailer.
Cheers,
-Scott
The post How To Do “Cinematic Style” Cropping in Lightroom appeared first on Lightroom Killer Tips.
![[DEV]Schenectady Photographic Society](https://dev.spsphoto.org/wp-content/uploads/2020/03/newsitelogo5-e1584673483198.png)