I don’t often get questions about how to apply keywords to photos, but I do hear from people who are struggling to regain a bit of order over an unruly keyword list. Unfortunately, there is no magic wand to wave and automatically fix a disorganized keyword list, you’ll need to roll up your sleeves, put the kettle on, and just get down to business. Keywording is a manual process, and you need to be prepared to do the heavy lifting.
Creating a Hierarchy
If you have already assigned keywords to photos and you want to retain those assignments and create a more structured list you should first consider creating that structure right in the Keyword List panel. You can drag and drop one keyword onto another to nest them together. Let’s say I have a flat keyword list that contains Animals, Dog, Mammals, and Mixed Breed. I can drag Mixed Breed onto Dog, then drag Dog onto Mammals, then drag Mammals onto Animals and create a logical hierarchy while maintaining all the assignments I’ve already made with those keywords.
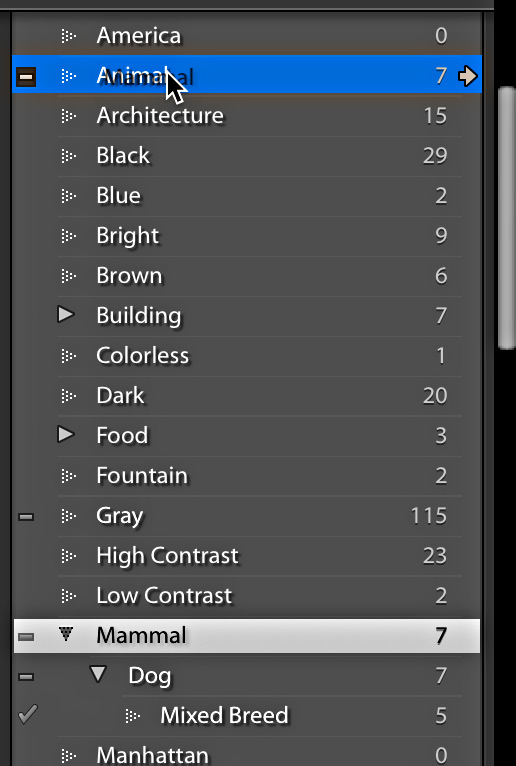
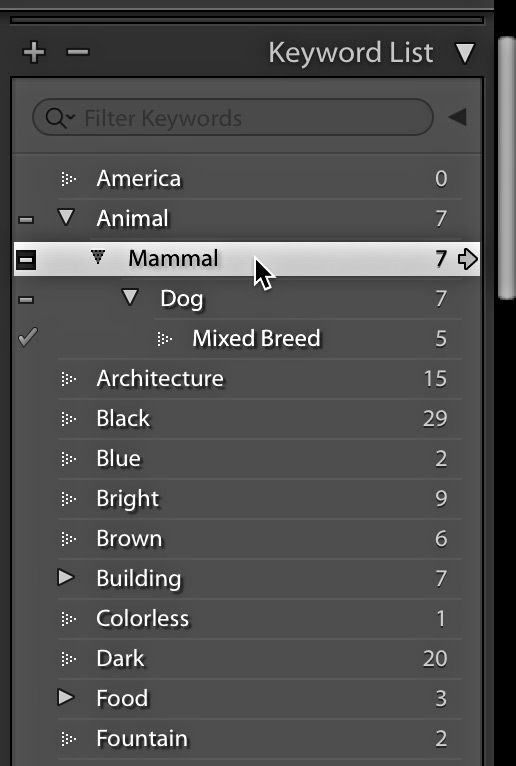
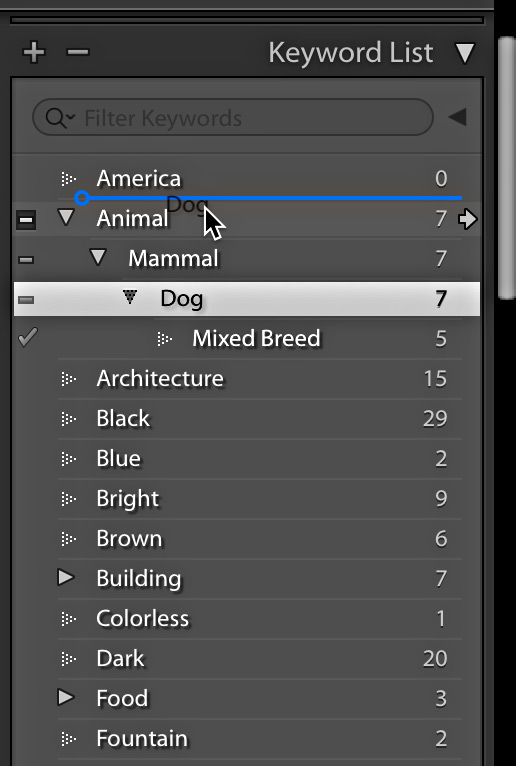
You can also move a child keyword out of a parent-child relationship by clicking and dragging it above its top-level parent keyword until you see the space above the parent keyword become highlighted, indicating you are leaving that structure, and release the keyword.
You can also purchase or find free keyword lists that you can import right into Lightroom Classic (Metadata > Import Keywords). Though I do want to point out that the importing of a new keyword list will not replace your existing keyword list. In other words, if you have a long flat list of keywords that you’ve assigned to various photos and you import a beautifully structured keyword hierarchy it is not going to magically transform your existing flat keyword list into a structure, but rather you will now have your old list with the new list appended on to it, all sorted alphabetically, and it is still up to you to assign the new keywords to your photos, or organize your flat list into a structure.
Re-Assign Keywords
Let’s say you do import a structured keyword list or simply have redundant keywords in your existing list and want to consolidate tags onto one keyword. Here’s how to transfer photos from one keyword to another:
Step One: Working in Grid view with the Keyword List panel expanded, move the cursor over the assigned keyword until you see the arrow appear to the right of the keyword total, and click that arrow to filter your catalog to only images tagged with that keyword. In my case I have a keyword for Dogs and another for Dog, and I want to consolidate them all under Dog.
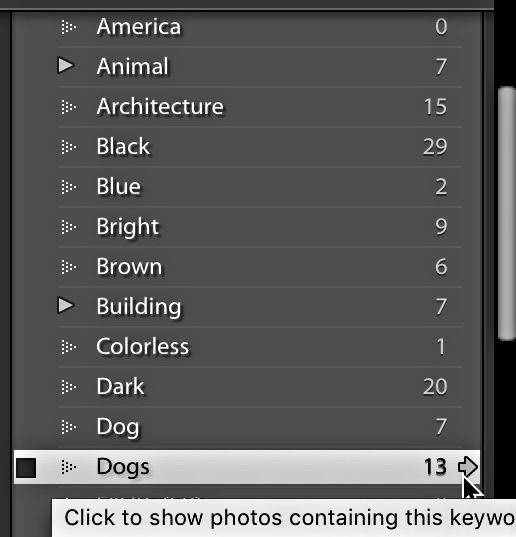
Step Two: Press Cmd+A (PC: Ctrl+A) to select all photos showing in the Grid.
Step Three: Move the cursor over the other keyword until an empty checkbox appears to the left of the keyword, and click the box to assign that keyword to all selected photos.
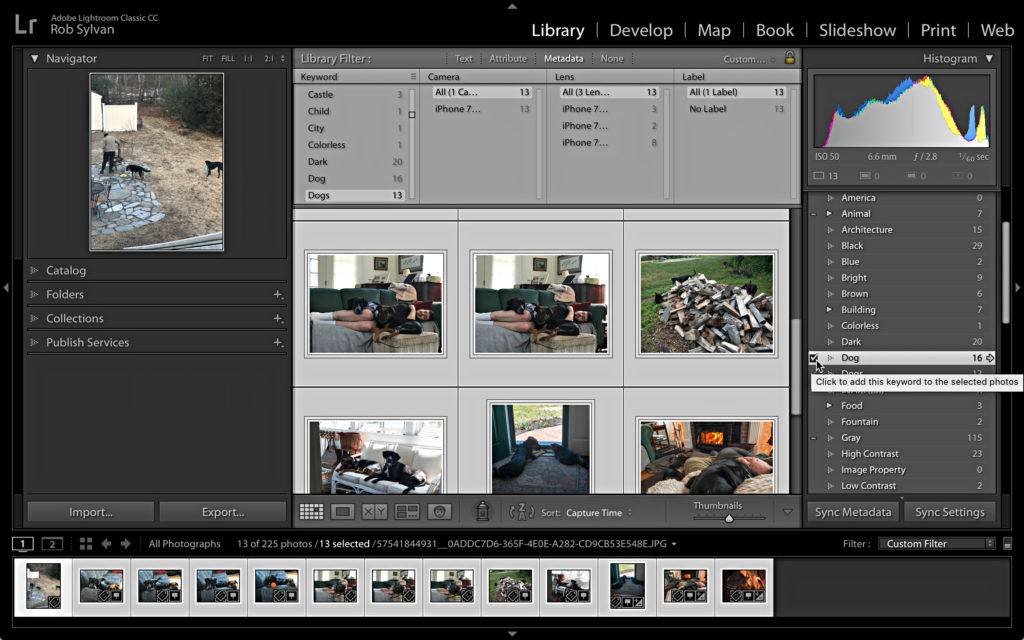
Step Four: Remove the check from the box next to the original keyword to un-assign it from those photos, or see the next section on removing keywords completely. Photos are now only assigned to the new keyword.
Remove Unwanted Keywords
If you simply want to remove a keyword from all photos and remove the keyword itself from your keyword list you can select the keyword in the Keyword List panel and click the minus sign that appears in the panel header. Removing a parent keyword will also remove its children. Proceed with caution.
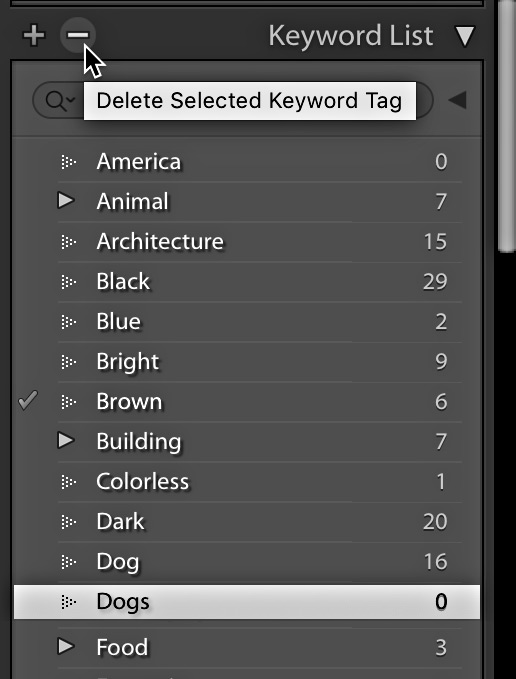
Tip: You can select multiple keywords in the Keyword List for removal as well. To select continuous keywords, click the first keyword then hold the Shift key and click the last keyword you want to select. You can select non-contiguous keywords by holding the Cmd key (PC: Ctrl) while clicking individual keywords.
Happy spring cleaning!
The post Controlling Keywords appeared first on Lightroom Killer Tips.
![[DEV]Schenectady Photographic Society](https://dev.spsphoto.org/wp-content/uploads/2020/03/newsitelogo5-e1584673483198.png)