By default, the latest version of Photoshop becomes the primary external editor for Lightroom Classic. If you go to Lightroom Classic > Preferences > External Editing (Win: Edit > Preferences > External Editing), you will see it listed at the top. This is the editor, and file settings, that are called into play when you use the (Mac) CMD+E / (Win) Ctrl+E keyboard shortcut or use the Photo > Edit In > Edit in Photoshop menu command.
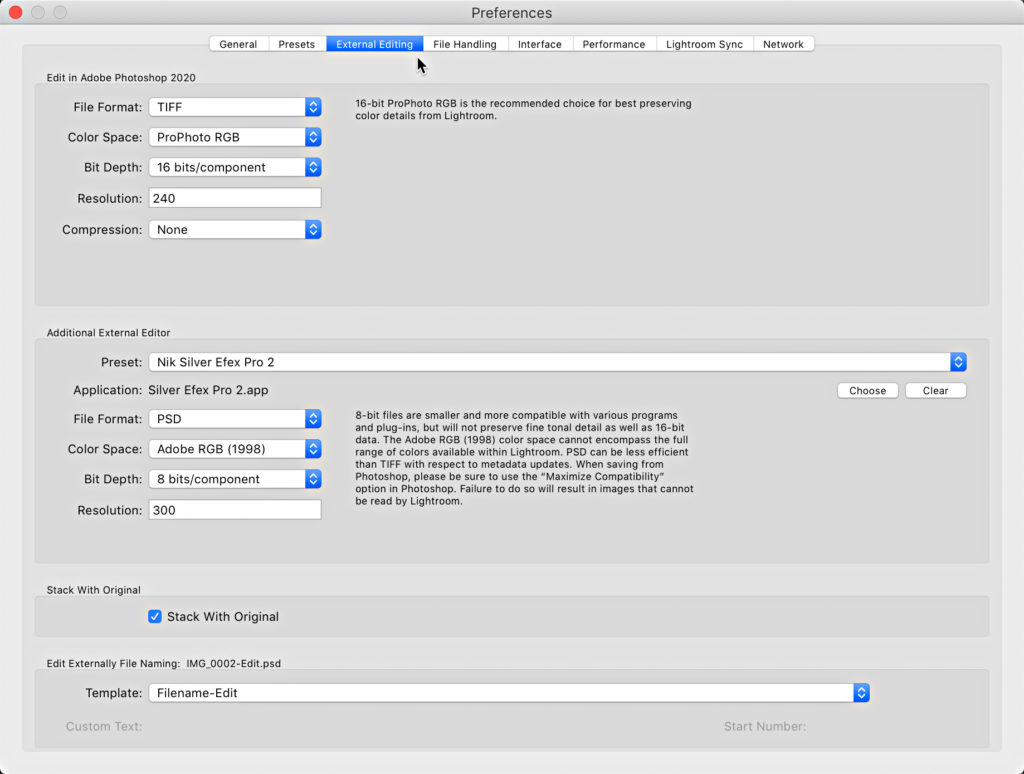
Additional External Editors
An external editor is any other pixel editor you may have installed on your machine. Aside from Photoshop, some of the most common are products from On1, Nik, Perfectly Clear, Topaz, etc. For most of these products, when you install that software the connection between it and Lightroom Classic are also installed. If you click the Preset drop-down menu under Additional External Editor you will see these listed.
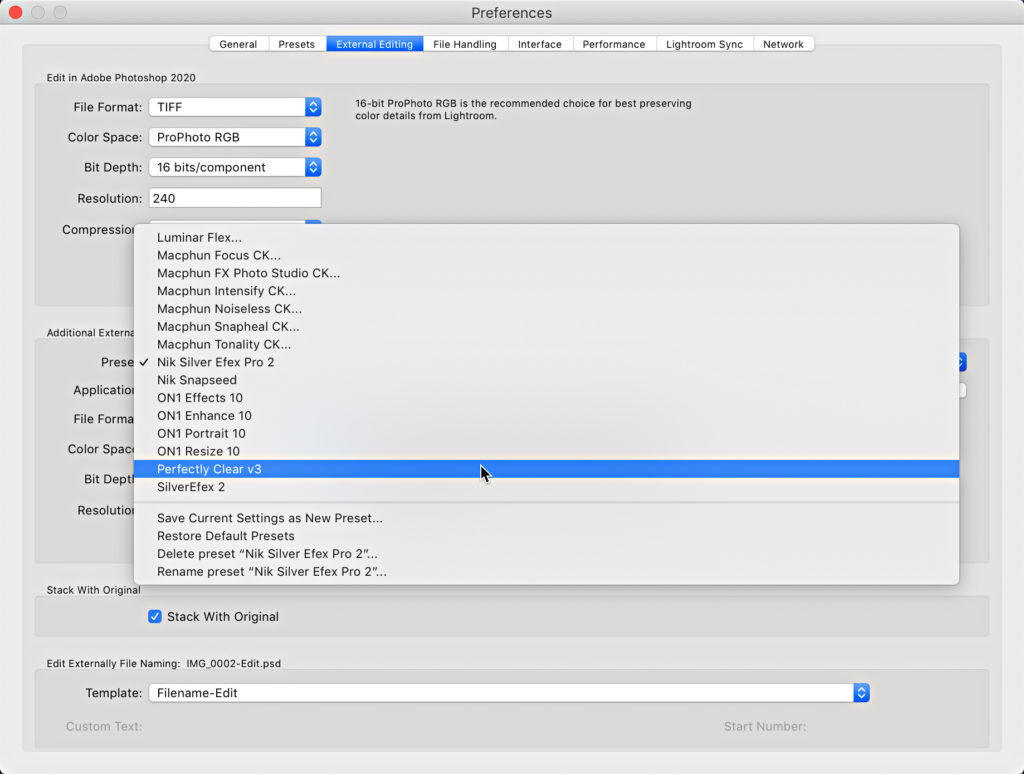
If you select one of those presets, you will see the file settings used when creating the copy that is sent to the respective editor. For example, selecting the preset for Perfectly Clear, I see that it is set to create a 16 bit ProPhoto RGB TIF file. If I wanted to change any of those settings, I could dial in my preferred choices, then click the Preset drop-down menu a second time and choose Update Preset from the bottom of the list. You can do this with any of the presets you have.
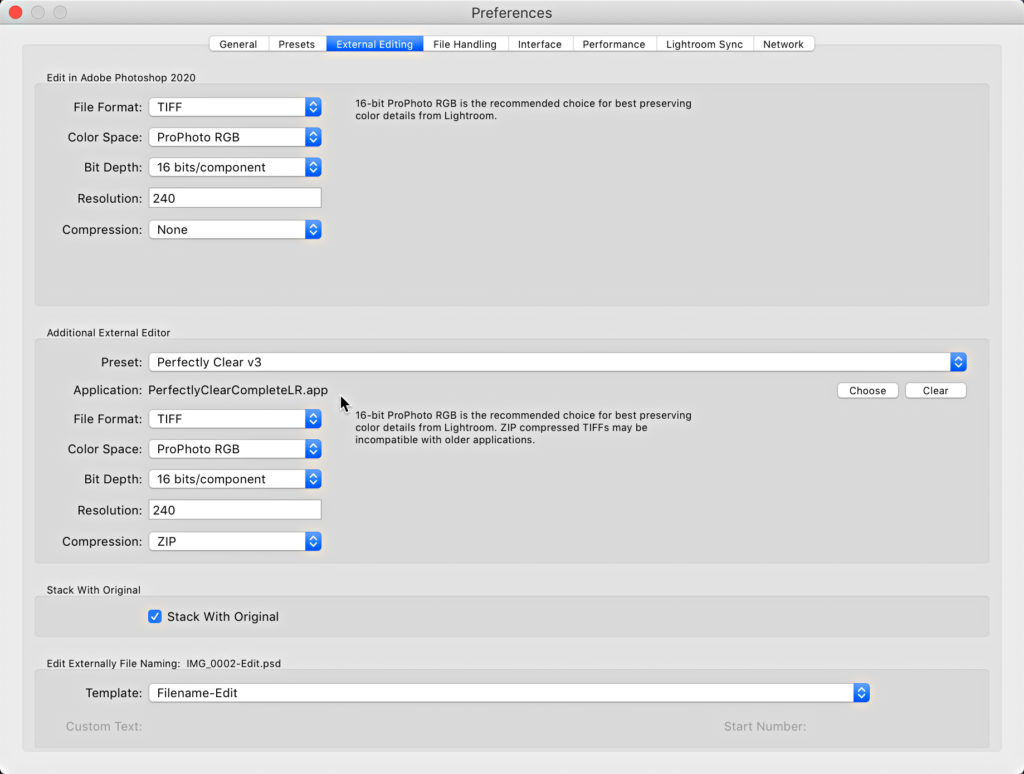
Adding New Editors
Alternatively, if you have an image editor that is not listed here and you’d like to be able to send a copy from Lightroom Classic to that editor, you can create a custom preset. For example, I have Photoshop Elements installed, and I need to use that for some of the classes I teach. Here’s how to create a custom preset:
1. Click the Choose button, and navigate to the program you want to open (Applications folder on Mac, Program Files on Win) and select it.
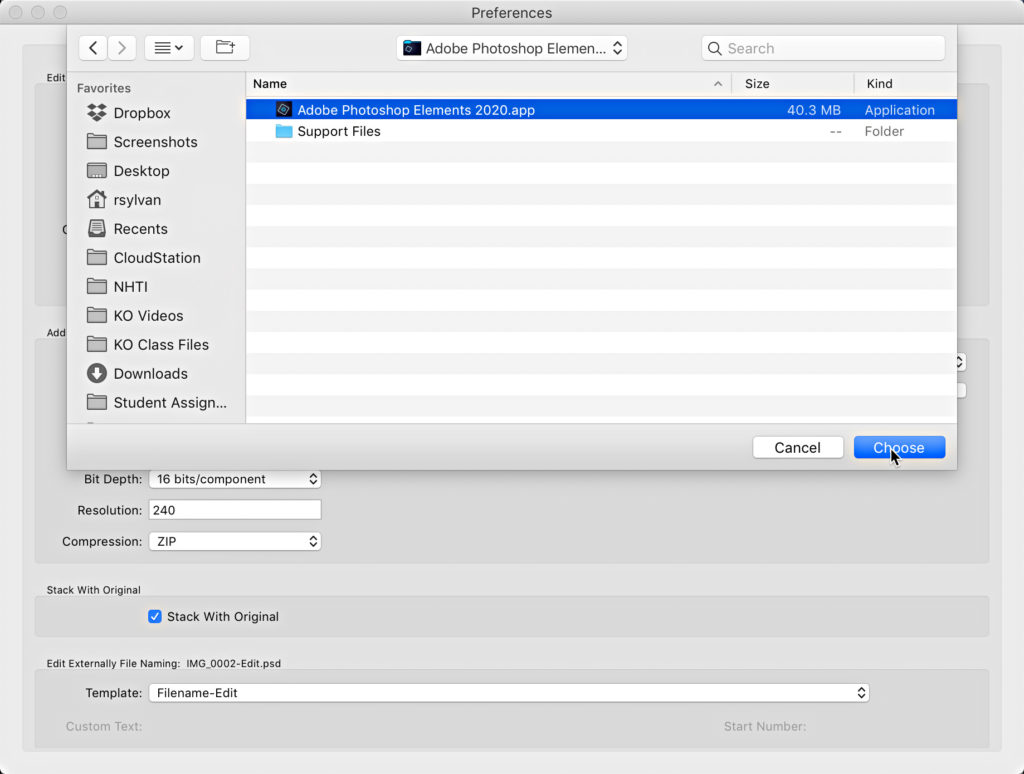
2. Configure the file type settings as desired.
3. Click the Preset drop-down menu, and choose Save Current Settings as New Preset, and give it a name.
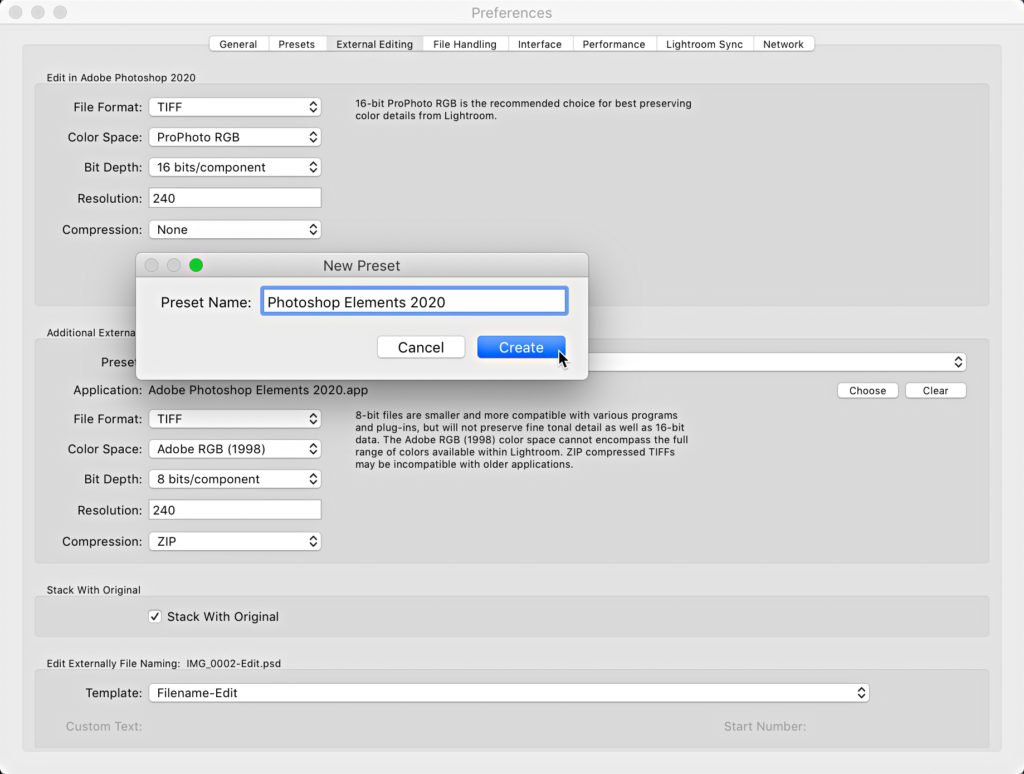
That’s it. You’ve now got a custom additional editor configured and ready to go. If there is an additional editor you use frequently, leave that preset selected in the Preset drop-down menu. That will make it available right under Photoshop on the Photo > Edit In menu, and when you go there you’ll see there is even a keyboard shortcut associated with the selected additional editor. Might just make your workflow one click faster.
You might want to file away my other article on how to clear out unused external editors for when that comes in handy.
The post Configuring Additional External Editors appeared first on Lightroom Killer Tips.
![[DEV]Schenectady Photographic Society](https://dev.spsphoto.org/wp-content/uploads/2020/03/newsitelogo5-e1584673483198.png)