5 Lightroom Classic Tips you probably don’t know
Lightroom Classic is the industry standard used by many photographers to manage and edit their photos. There are lots of hidden gems in Lightroom and I want to share my 5 favorites with you. These will save you a lot of time and get great pro level results. (all photos by Colin Smith)
Lightroom Tip #1: Using masks to change the color and relight backgrounds.

Choose the develop module.
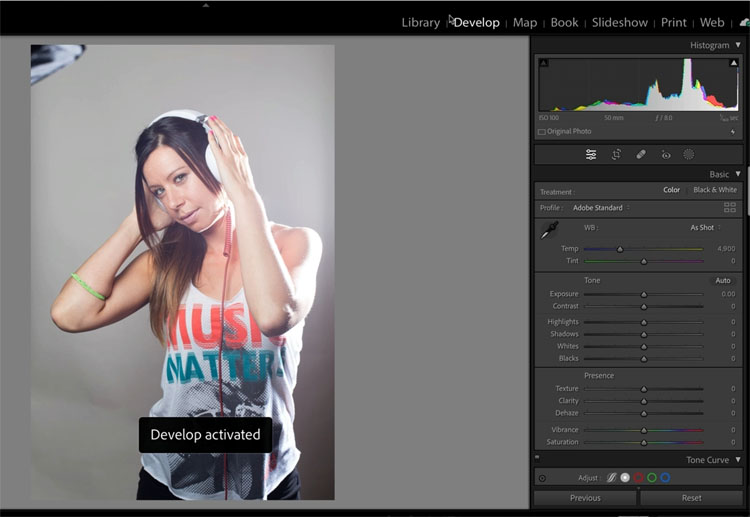
Click on mask and then background
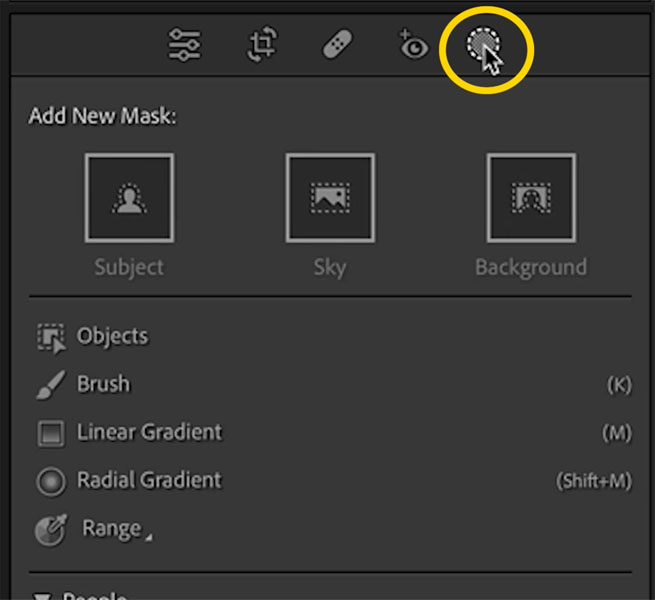
9In this case Background didn’t get a good mask, so here is another option)
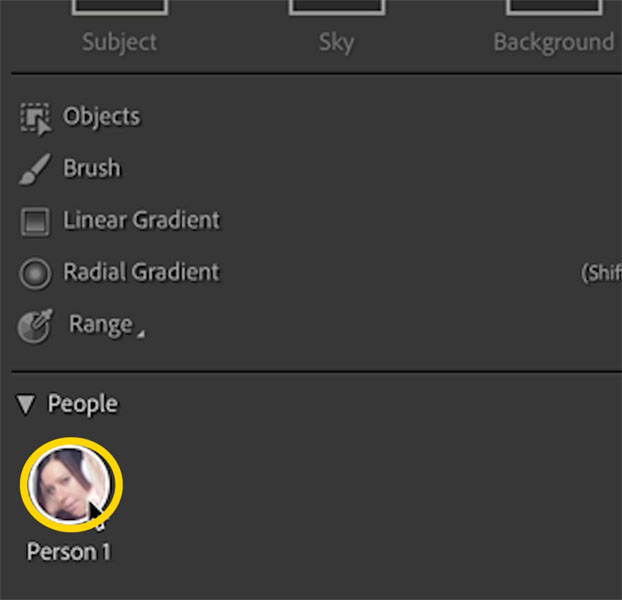
Choose person
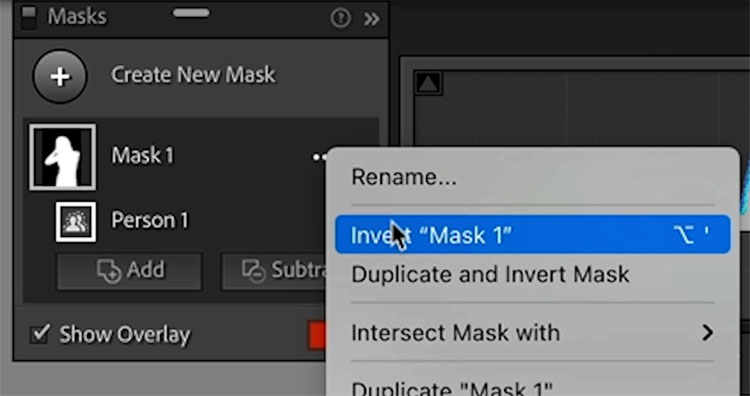
Right-click on mask and then Invert.
This will give you a background selection.
Hover over add / subtract and hold down the Shift key. This will give you Intersect.
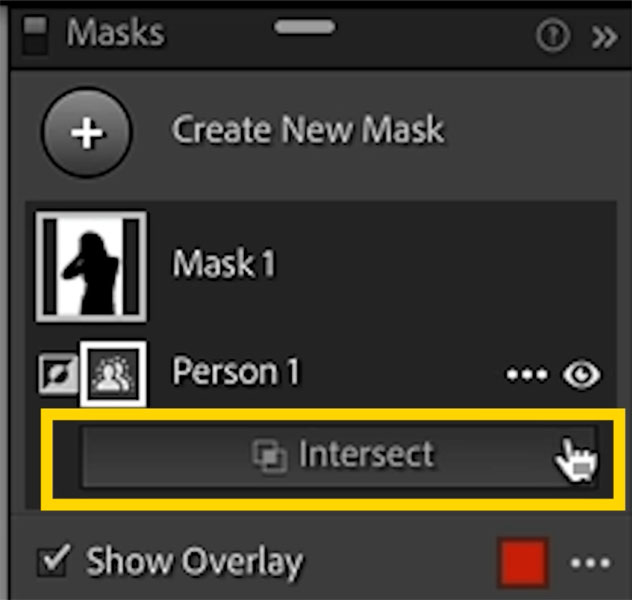
Intersect will only show the adjustment where the tool overlaps the mask.
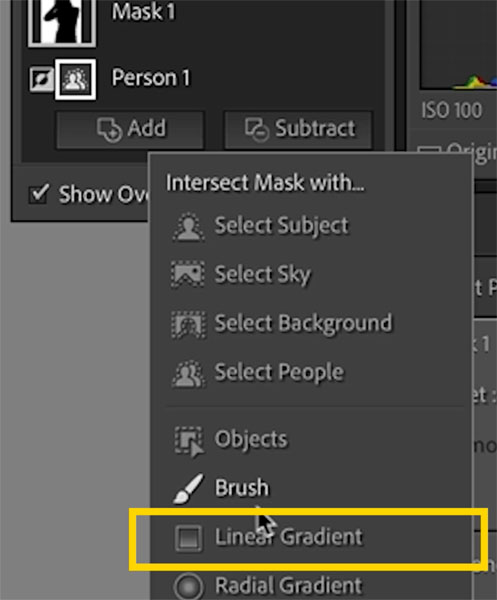
Choose linear gradient.
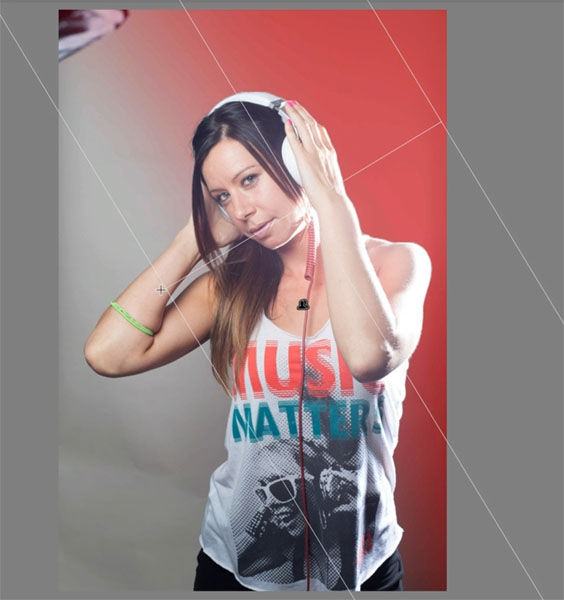
As you drag the gradient notice that it only affects the background and not the subject.
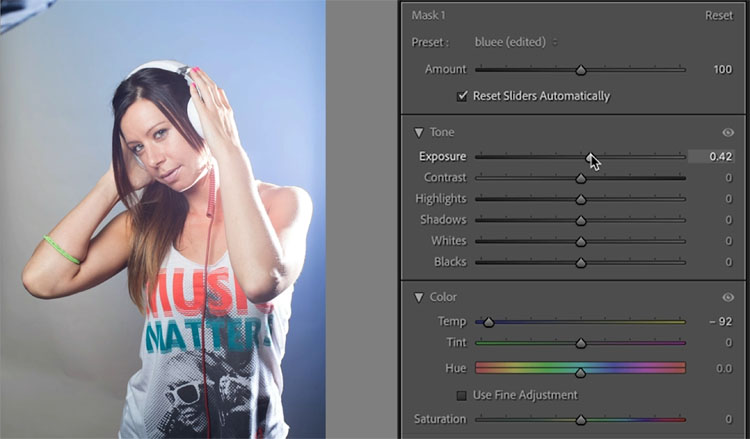
Adjust the temp or hue to get the color you want. Here we used temp and exposure to get a clean blue.
Part 2, creating a lens flare
Choose Create mask, to add a 2nd mask
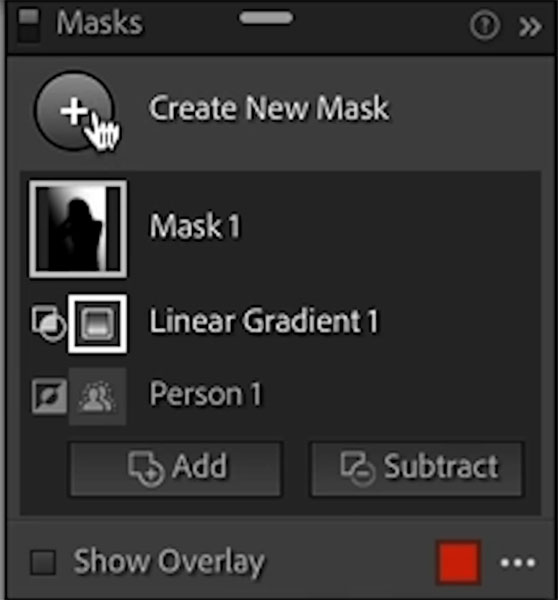
Radial Gradient is the option we want.
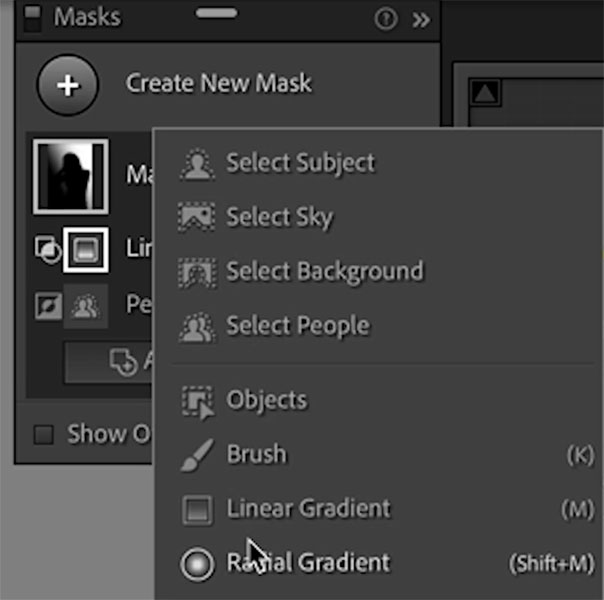
Drag on the image to create a circle. Push ex[posure all the way up to make it bright like a light.

And here we have a hotspot or a lens flare of kinds.
Since I backlit the model in this photo, the lens flare plays well with the aesthetic.

Lightroom Tip: Batch Process ai Masks
I actually didi a bit with this last week in my Camera Raw tutorial, but here is how we do it in Lightroom.
Choose a mask and select person
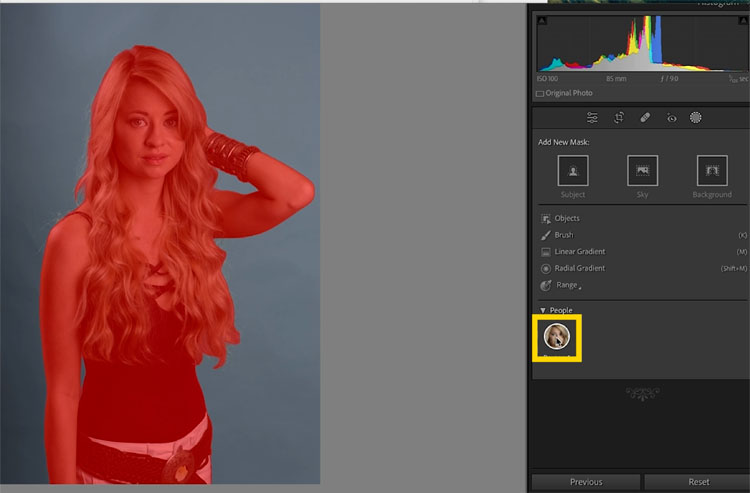
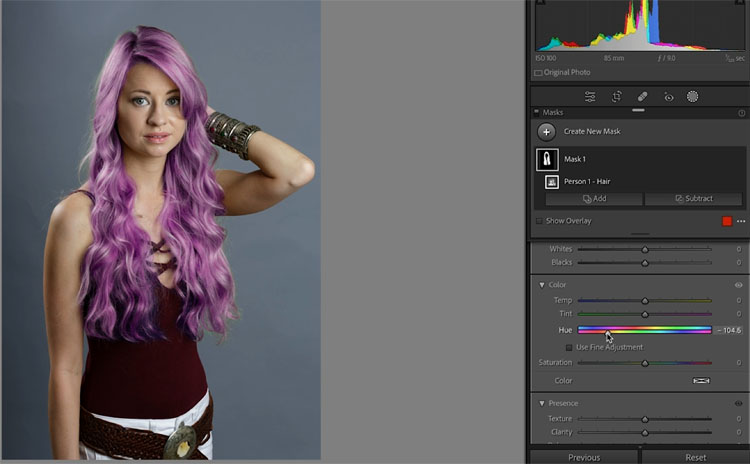
We will select hair. Now, this could be any, or all of the retouching tools. Im going to change the color of the hair, just because it’s easy to see the result. It could be sky darkening or any of the ai masks really.
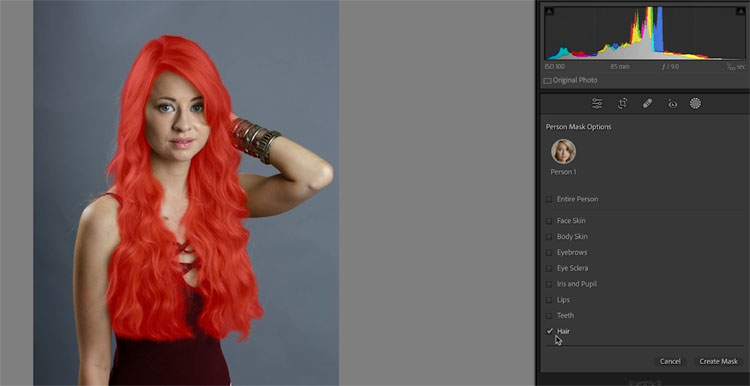
Move hue to change the hair color. (Or whatever adjustments you want to make)
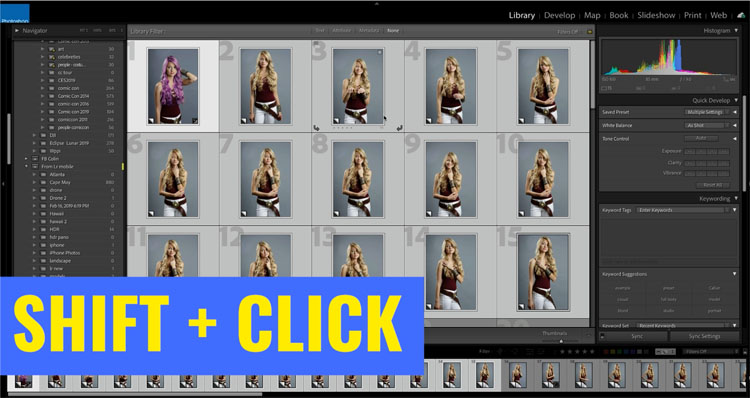
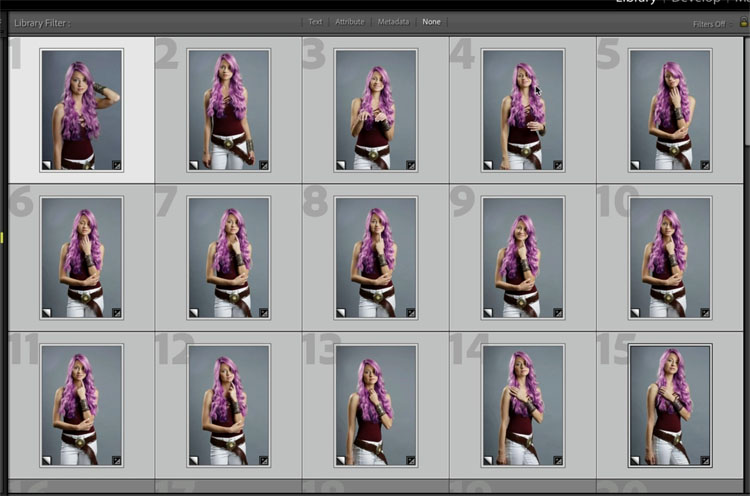
Go back to the library module.
See the first photo has the pink hair and the others are blonde.
Select all the photos you want to copy the edit to.
Click sync settings
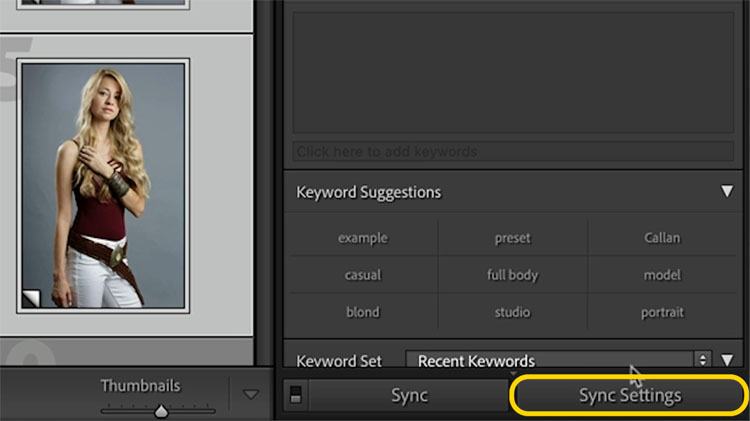
Choose Mask from the settings that pop up.
Click Synchronize
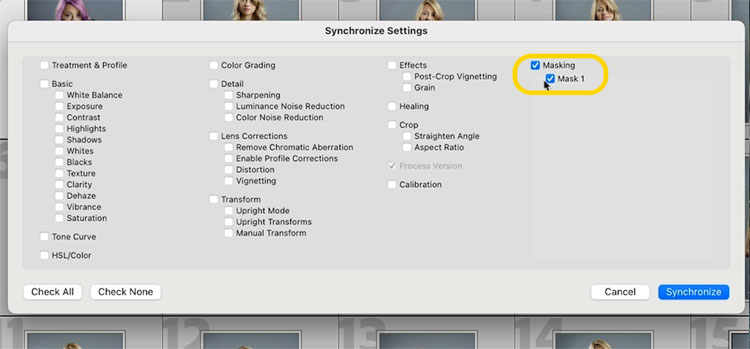
And after a few minutes (this could take a while depending on how many photos you are syncing), you will see the ai masks adapted for each of the photos and applied the adjustment.
Lightroom Tip 3: Color Grade Video
Yup, you can adjust video in Lightroom, here is how.
If you are in Lightroom Classic and choose the develop module, you will see a warning, Video not supported in Develop. That’s it? Give up? Never! Here is a sneaky hack.
(You can edit video directly in Lightroom CC).

Go back to Library,
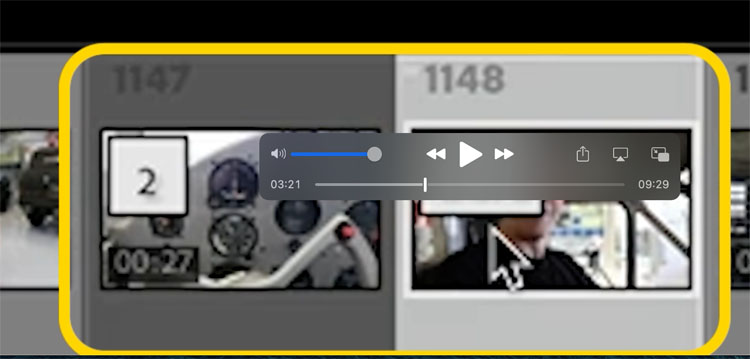
Click on the video to open it.
Look for the video strip at the bottom of the clip.
Hit the geat and choose capture frame

This will take a screen capture of the video. Choose the image that was created.
Now you can edit the image just like any other image. Give it a nice color grade.
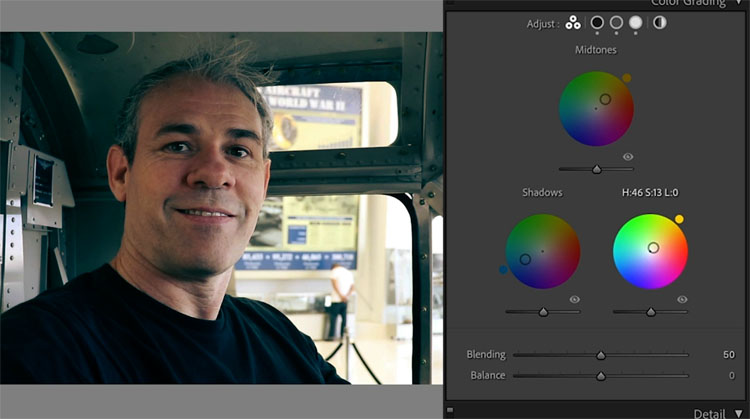
Beautiful! But how do we get it to the video?
Sync of course
Choose the image and Ctrl/Cmd+Click on the video on the filmstrip to select both. The image should be the “most selected”
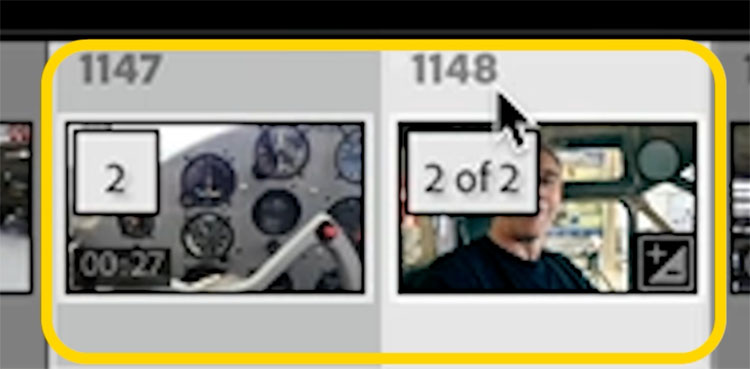
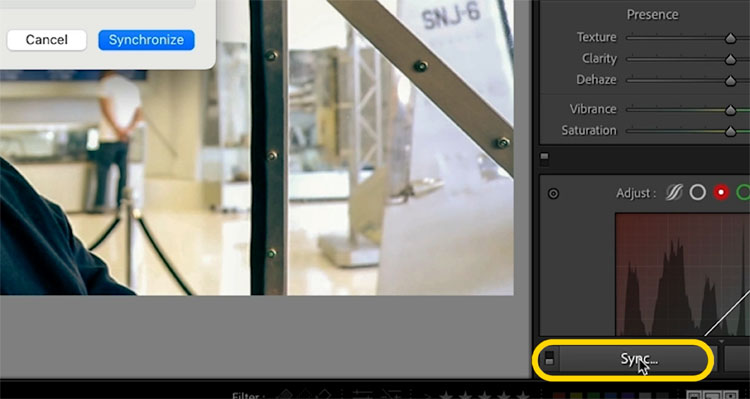
Click on Sync
Choose all settings and press Synchronize
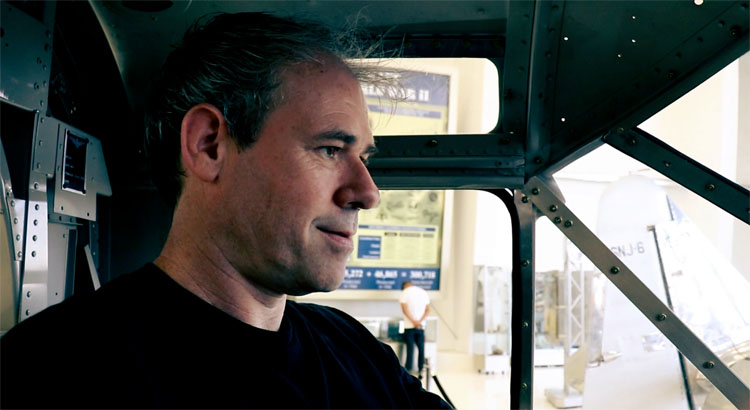
Now the video is color graded with the same settings. You can use presets if you prefer, or just sync like we did here.
Lightroom Tip #4:(crowd favorite) Photoshop and Lightroom and back, Integration
Imagine having your Lightroom settings visible in Photoshop and your photoshop filters visible in Lightroom. Pipe-dream? Nope, let’s go!
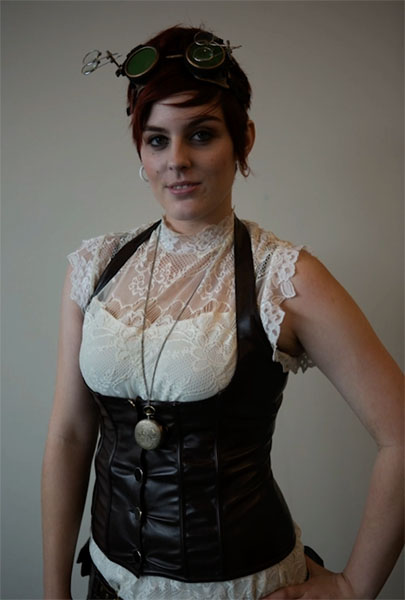
Here is a shot SOOC that I snapped at San Diego Comic Con of this cosplayer. But we want an old vintage film look.
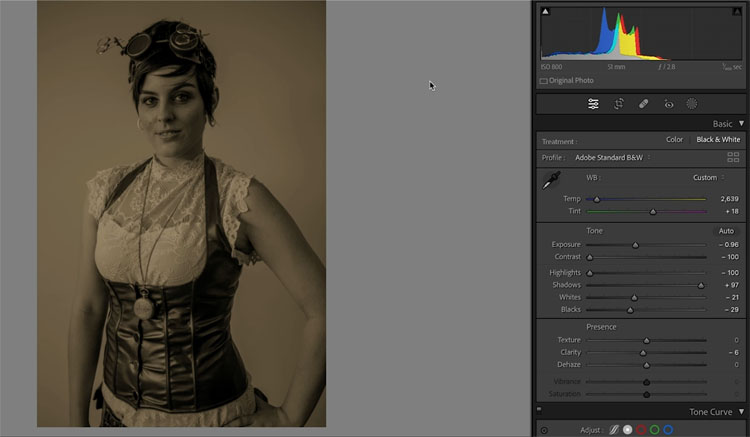
I applied some adjustments in Lightroom.
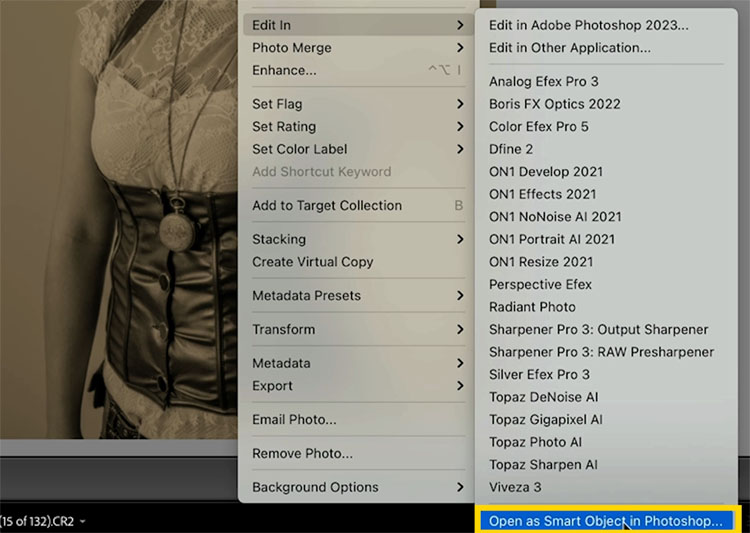
Right-Click and Choose Edit in>Open as Smart Object in Photoshop
Photoshop will open
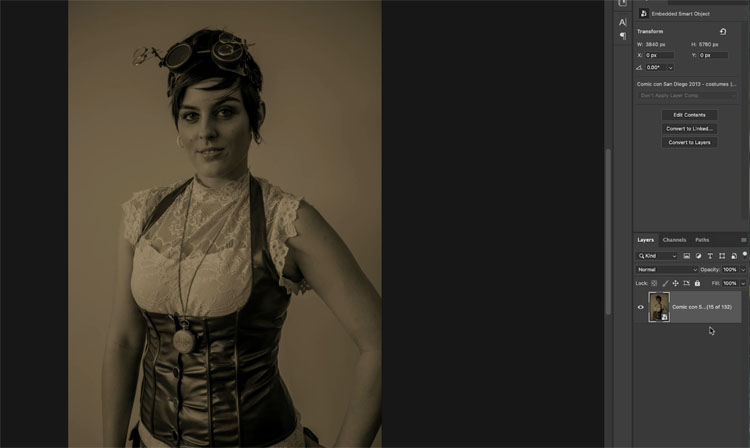
Double click the thumbnail in the Layers panel and Camera aw will open.
Notice the Lightroom settings are visible and the same in Camera Raw. Completely editable, make adjustments if you like.
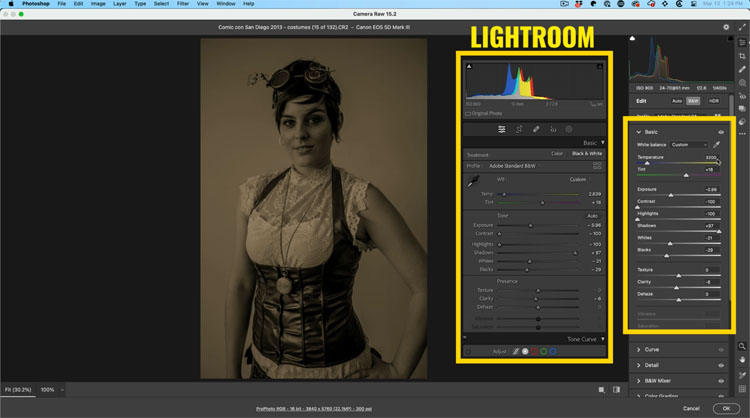
Press ok. Back in Photoshop. The image will update if you made any adjustments.
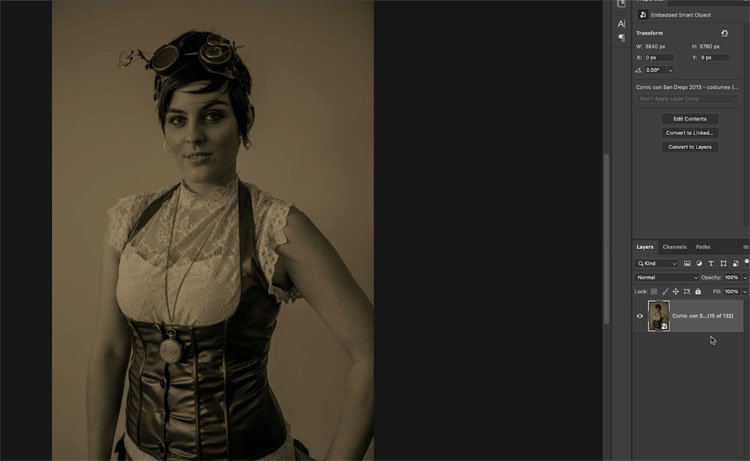
Let’s make some adjustments to add a slide sandwitch effect to the sepia tone, to complete our vintage effect.
Press Ctrl/Cmd_J to duplicate the layer.
Choose Filter>Blur>Gaussian Blur.
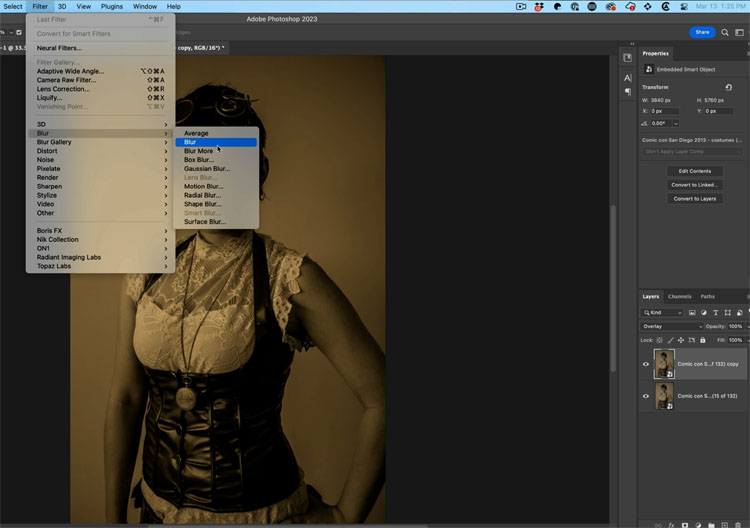
Adjust the blur to around 50 to get the desired effect. Lower the opacity to 20-30%
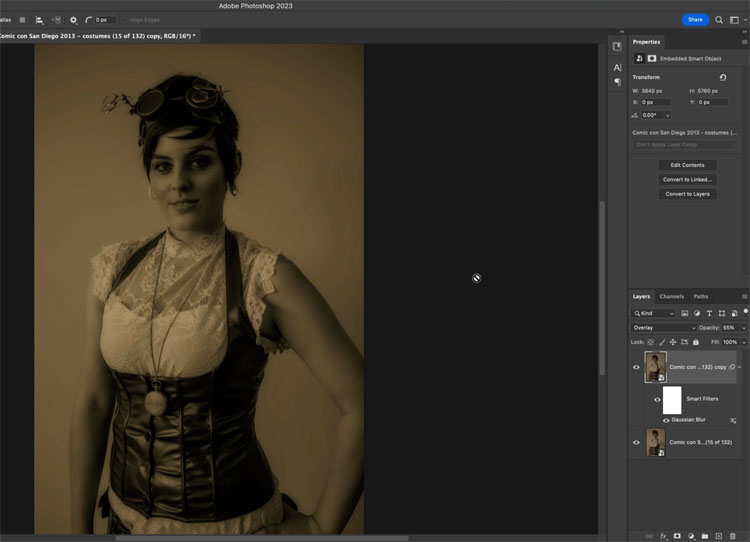
Press Ctrl/Cmd+S (Ctrl (windows) /Cmd (mac) +S) to save.
Go back to Lightroom. Notice a new Virtual copy has been created with the effect applied. (This contains the full layered file)
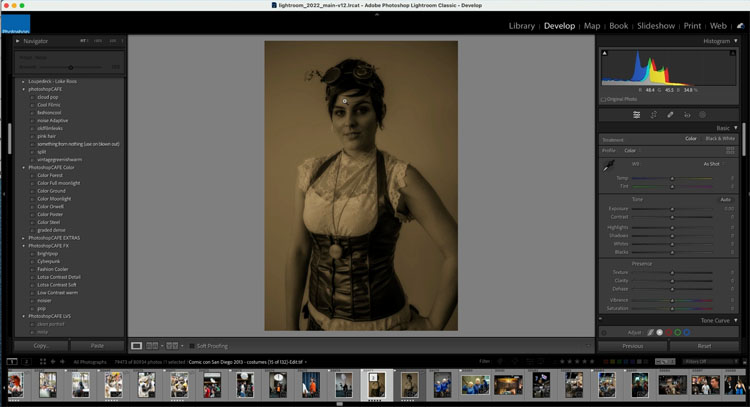
If you want to adjust it more, don’t change it in Lightroom. You meed to go back to the original to keep it fully editable.
Here is how
Right-Click and choose Edit in Photoshop
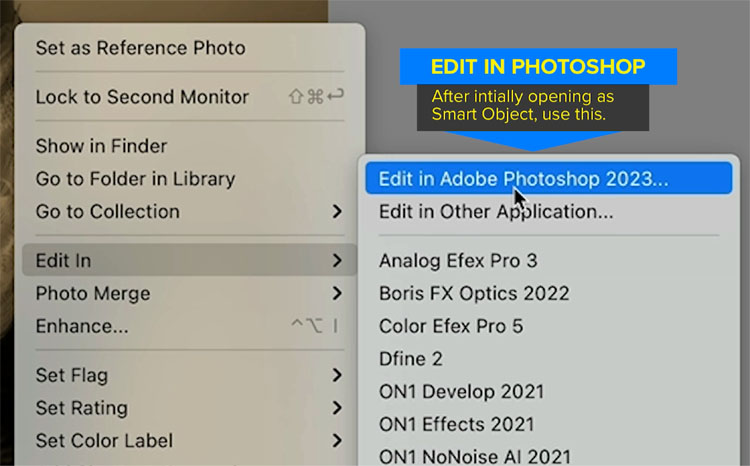
Choose Edit original
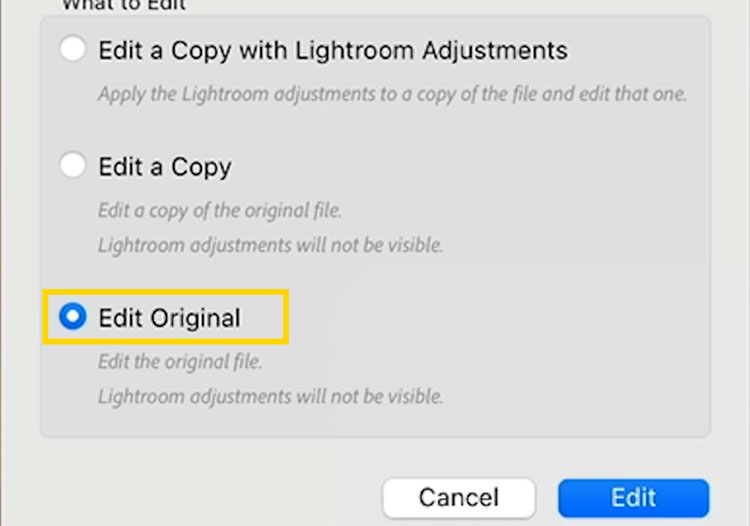
Photoshop will open and you will see the full layered file.

Double-click to open in Camera Raw
Make adjustments, lets change the color,
Press ok
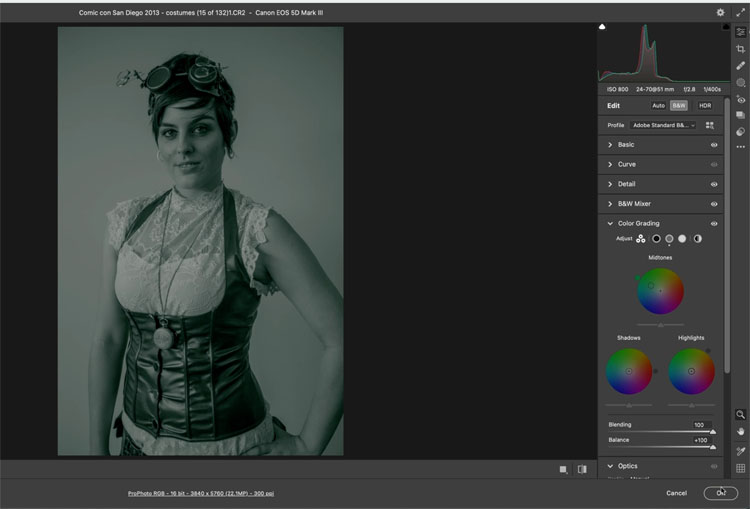
The image and all the layers will update in Photoshop.
Save the image and open Lightroom
Notice, the image has updated. We can can go back and forth all day now.
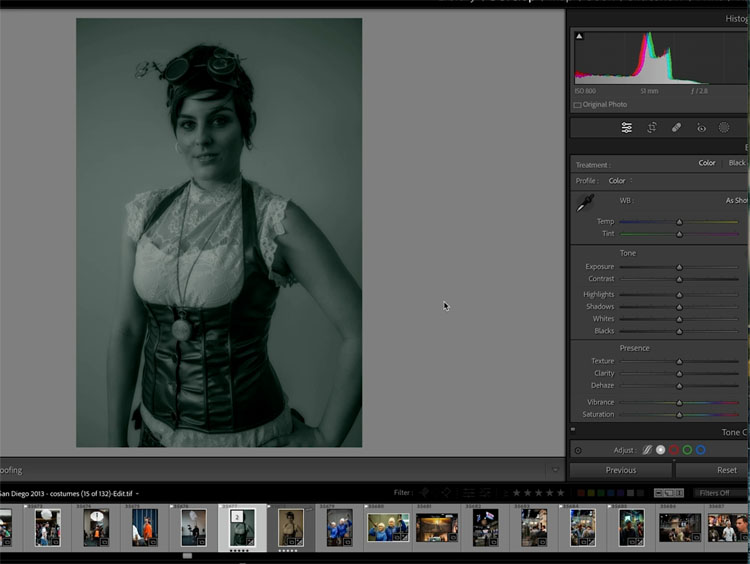
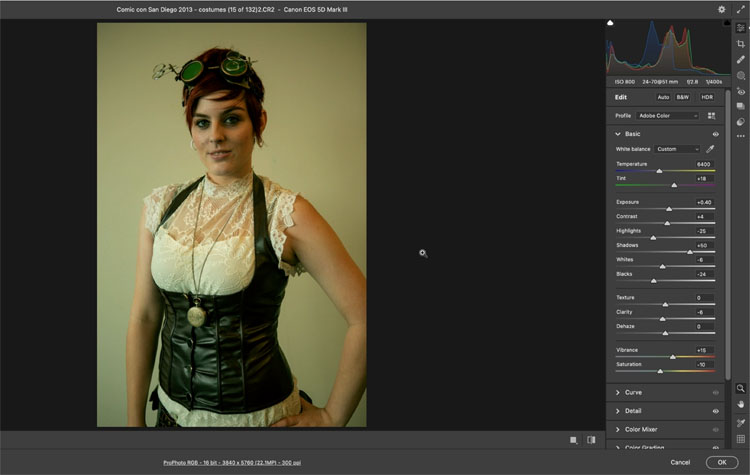
To prove it, we opened the image in Photoshop again (as before) double click to open in camera raw.
Notice that we can still get back to the original colors if we like. That’s flexibility. (I suggest watching the video at the top to really grasp how this works).
Tip 5: Getting rid of dust and spots

Heres a shot of the thunderbirds from the Huntington Beach air show.
Bad me, didn’t wipe down my lens and you can see spots on the image.
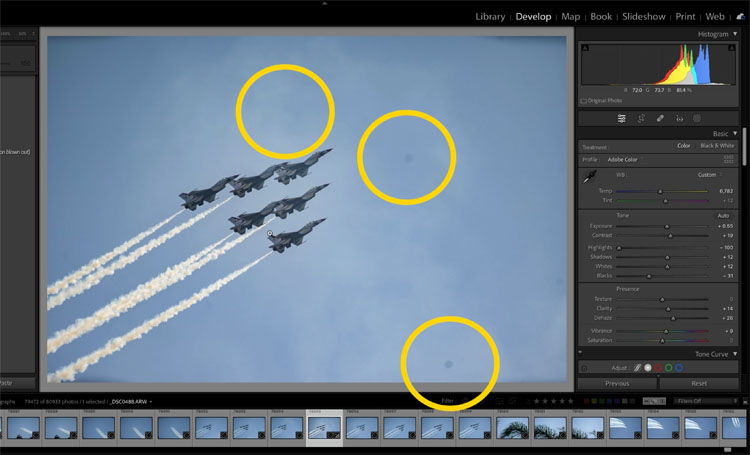
Choose the healing brush tool from the toolbar.
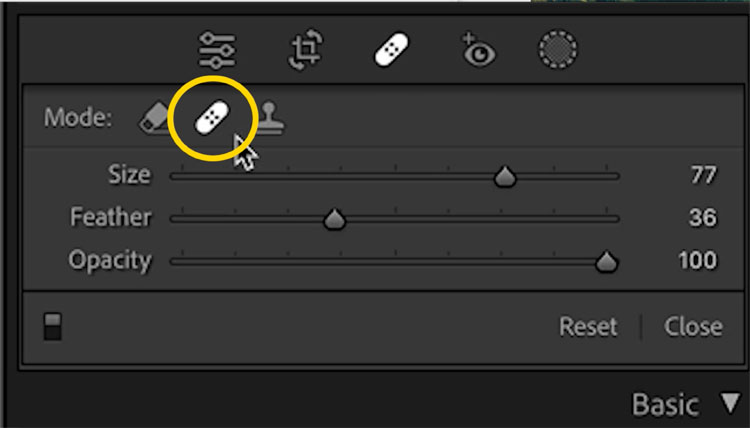
Tap to remove the spots, really easy.
What’s not so easy is finding all the spots. But there is a hidden tool to help
Press the T key, to open the toolbar
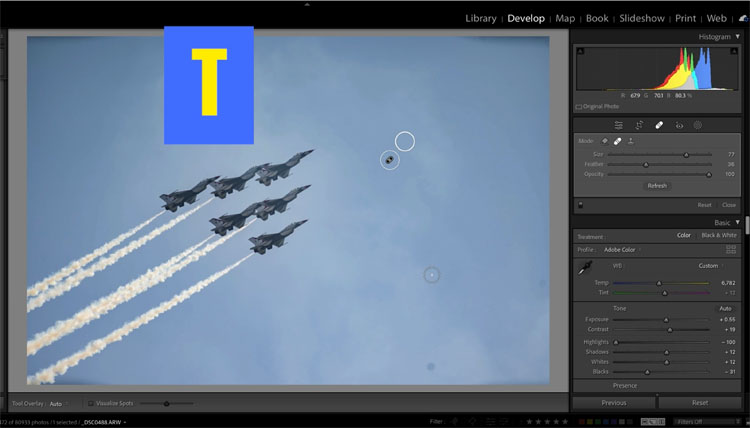
Click on visualize spots and move the slider to reveal the spots
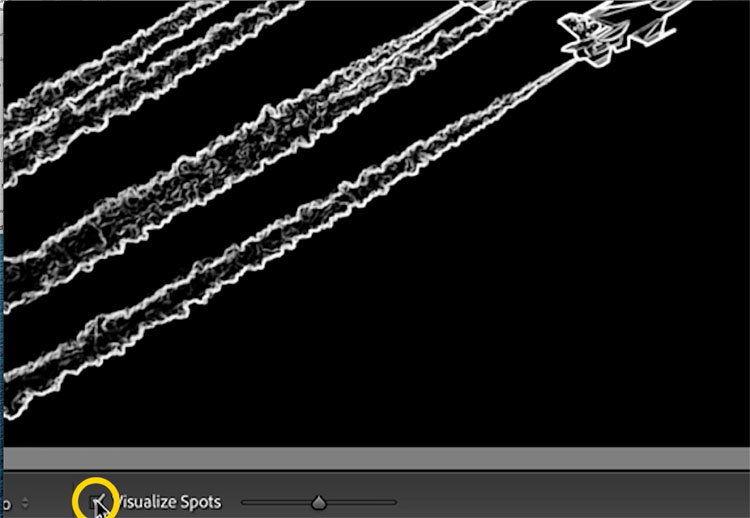
Now we can easily see the imperfections as we spot them out. (I resisted, the urge to pun by saying “spot the spots” phew, close call.)
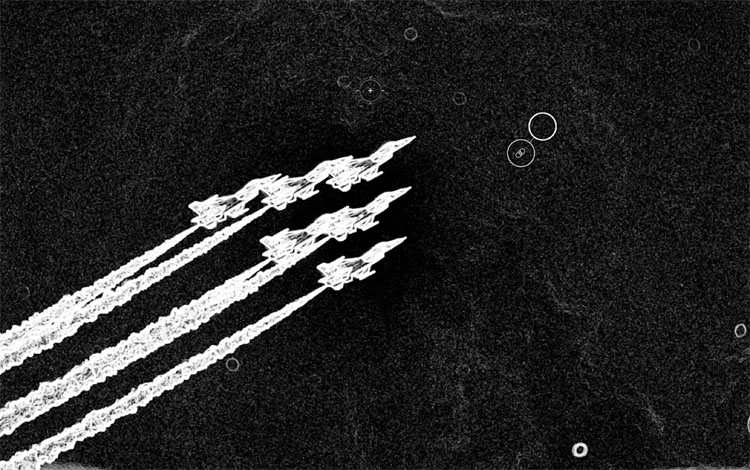
here are my fixes, some of them we could have easily missed.
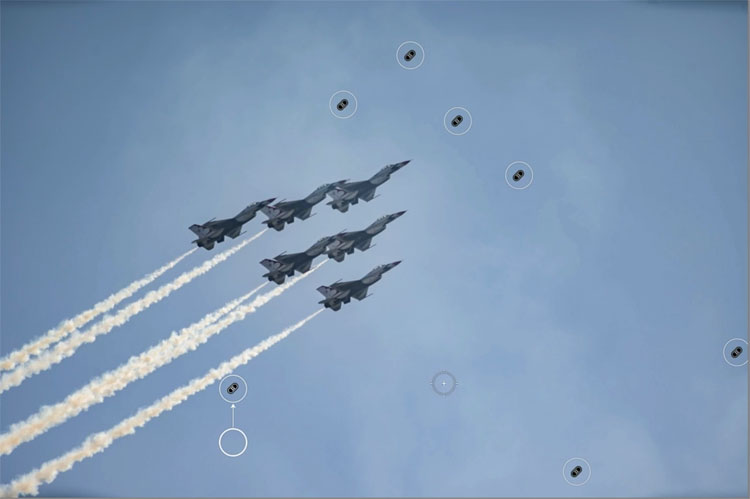
And the final. Much better. I will crop out the vignettes on the edges later.

I really hope these Tips were helpful.
If you want to really dig into Lightroom, check out my course Lightroom Classic 2023 For Digital Photographers here.
Use the code LRPSC23 to save 20% for a limited time.
If you like these tutorial, check out all the other hundreds of tutorials here at the CAFE, I suggest 5 Tips in Camera RAW
Grab Free Lightroom Presets and profiles here
Great to see you here at the CAFE
Colin
The post 5 Massive Lightroom features you need to know appeared first on PhotoshopCAFE.
![[DEV]Schenectady Photographic Society](https://dev.spsphoto.org/wp-content/uploads/2020/03/newsitelogo5-e1584673483198.png)
