How to instantly and easily change the color of something in a photo using Photoshop
In this Photoshop tutorial, Colin Smith shows you how to quickly change color of anything in photo using Photoshop. You can instantly change colors on very complex shapes without any selections using this neat trick. I suggest watching the video first and then using this written text as a reference to come back to, so you don’t have to take notes.
How to change the color of anything in Photoshop without selections
Let’s start with this design I made for the cover of Photoshop User Magazine.

I shot the original photo in my studio with model Llana Barron and used my Ibanez Jem guitar. The rest of it was a little 3D and compositing in Photoshop. made this for a tutorial that I did in the magazine. If I have enough people ask, maybe I’ll redo the tutorial here. Anyway.. on with the color change tut.

Step 1. Isolate the area
We are going to change the color of the skirt and text, so using the rectangular marquee tool, make a selection across the bottom part of the image. No point in changing the top and adding unnecessary work.

Step 2.
In the layer’s panel, choose the Hue/Saturation adjustment layer
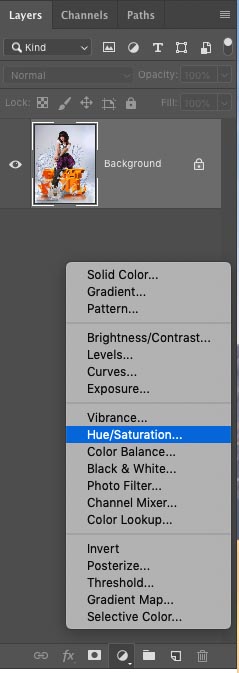
Step 3.
If we change the hue, the color will change in the entire image. We only want to change the skirt right now and make it blue.
As you can see, it would take a while to cut it out, but we don’t need to. Choose the picker tool (The little finger with the arrows) 
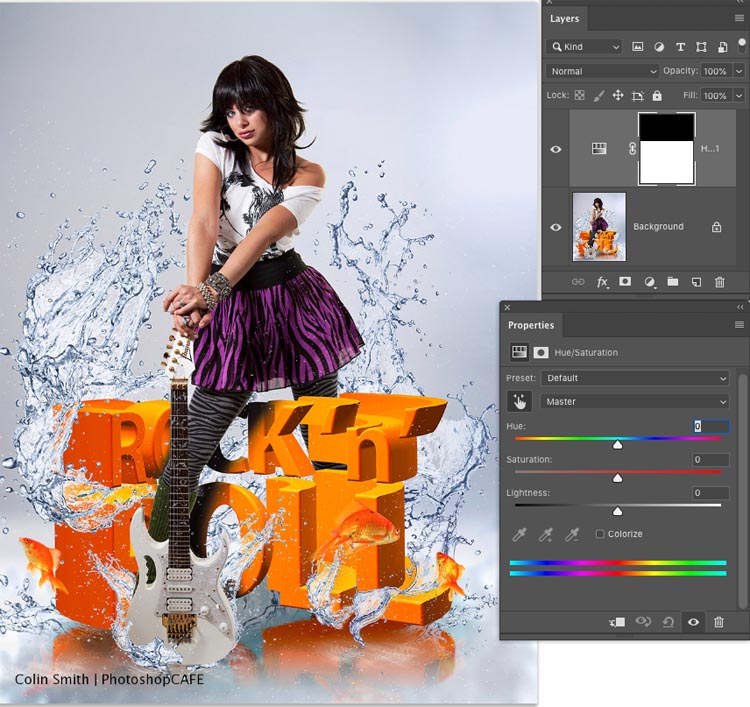
Step 4.
To choose the color, click on the purple of the skirt. Now move the hue slider and notice that only the purple changes. Neat huh?
Tip: Hold Down Ctrl/Cmd and drag on the color and you can change it on screen.

For some of you, this is all you need, see ya!. j/k, stick around, it gets better.
Step 5.
If we want to change more than one color, we don’t have to redo anything. With Hue/Satch still open, choose the finger again and this time click on the orange of the text. (Could you imagine trying to select that AND the reflections too? Let’s make it blue. Drag all the way to the Right on Hue. Notice its all weird? This is because Photoshop didn’t select all the orange. This is the 2nd thing for you to learn here, how to refine the color selection.
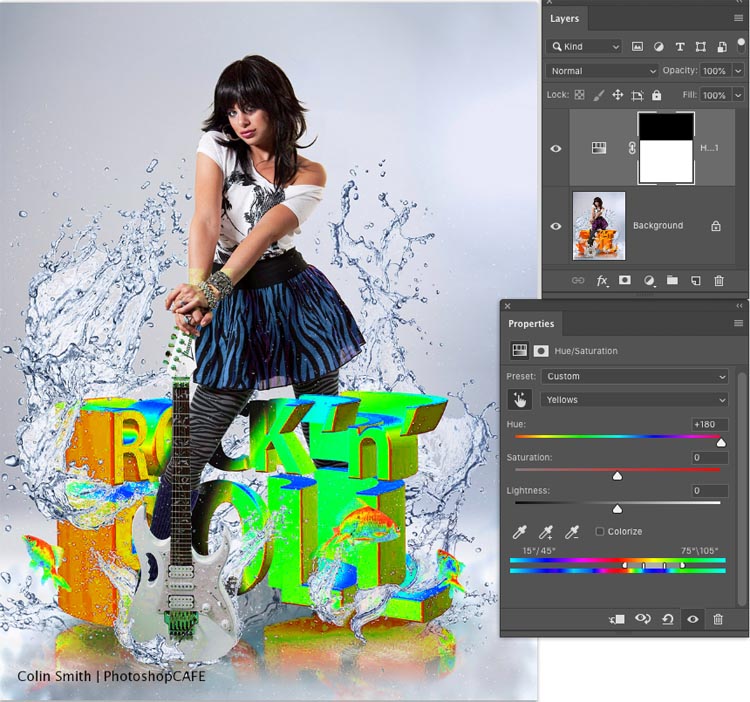
Step 6.
At the bottom of Hue/Saturation os a color scale with color stops on it. This is the selected color range. We need to increase this range to cover a larger range of oranges.
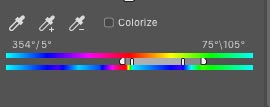
Move the sliders; both the triangles and the inner sliders and you will see a perfect selection and a nice blue now displaying.
Sweet! But her hands look like they have blue rubber gloves on. This takes us to the 3rd thing, how to fix over-selections.

Step 7.
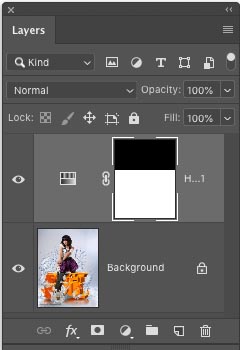
It’s actually really easy. Every adjustment layer has a built-in mask. As you can see on the mask, the top is black and the bottom is white. Where the mask is black, it hides that current layer, where its white, it shows it. All we need to do is add black to the areas we don’t want changed.
Make sure the layer mask is selected by clicking on it.
Step 8
Choose the brush tool (B key)
Select black as the foreground color.
Paint over the areas you want to protect and you will see the original colors come back. If you go over the lines, paint with white, to bring back the adjusted color.

Step 9
Just for fun, I painted the mask over the fish to bring back their original color. I have nothing against blue fish, but orange goldfish look better I think.

And there you have it. Nice and simple, but a huge time-saver.
I really hope you enjoyed this week’s tutorial here at PhotoshopCAFE.
Thanks,
Colin
PS Don’t forget to join our mailing list and follow me on Social Media>
(Ive been posting some fun Instagram and Facebook Stories lately)
You can get my free Layer Blending modes ebook here
The post How to Change the Color in complex objects in Photoshop without selections appeared first on PhotoshopCAFE.
![[DEV]Schenectady Photographic Society](https://dev.spsphoto.org/wp-content/uploads/2020/03/newsitelogo5-e1584673483198.png)